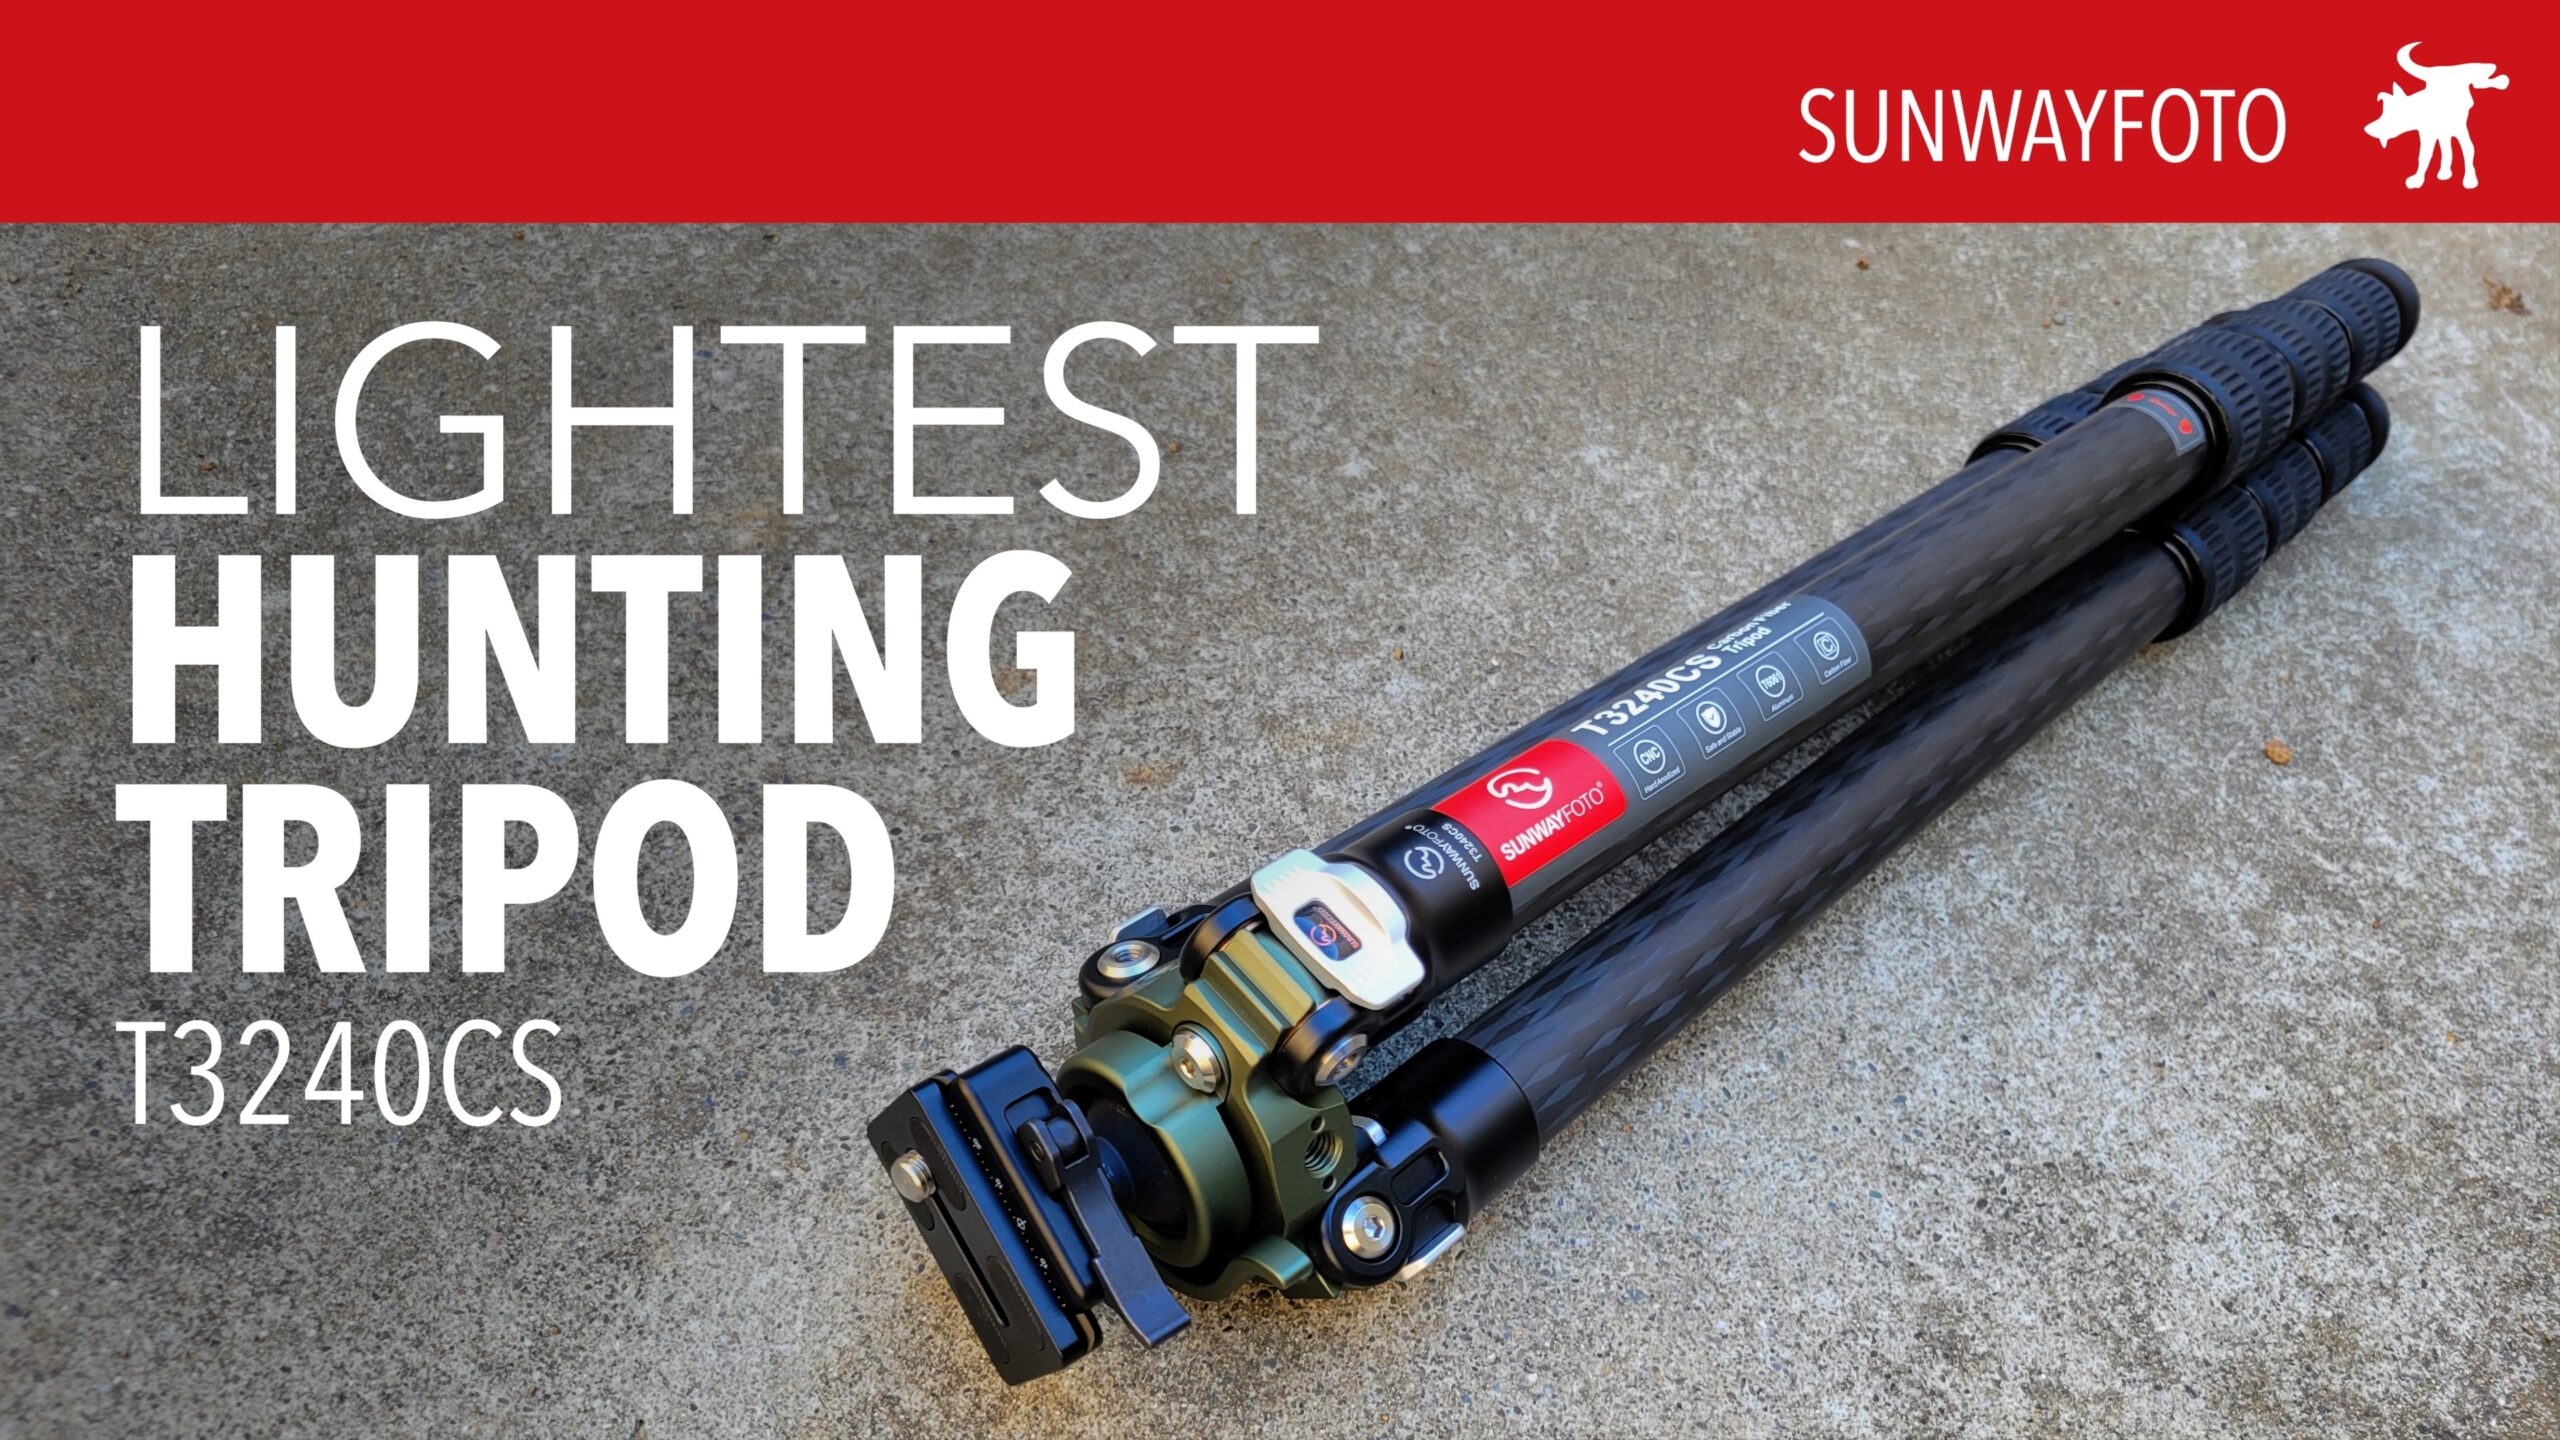
Category Archives: Gadgets

Sunwayfoto TT2340CE Tripod

When I was offered a travel tripod by SunwayFOTO, I wasn’t expecting more than another clone Chinesium tripod that would likely last long before some screw stripped itself. What I got was a feather light carbon fiber tripod that impressed me.

This tripod comes in a black velvet pouch containing the folded and collapsed tripod and a plastic pouch containing four Allen wrenches (to tighten screw joints which work their way loose over time) and a cleaning cloth. While the velvet was probably meant to make it feel high end and protect the parts, it does make for a dust magnet.

The tripod weighed in at 1.67 oz on my scale and that includes the metal ballhead! The overall length when collapsed was barely 14″. Technically I’ve used lighter tripods but these were mini-tripods or accessory tripods; not real photo tripods that you could mount a full sized DSLR and telephoto lens with any confidence or stability, and certainly not at eye level. Fully extended, the tripod stands at 52″ in height, perfectly standard.

The ball head has a slight divot cut in the ARCA QR mount to make room for the tripod foot to rest in it, making the tripod just few millimeters smaller. Levers were used instead of twist heads for added torque on locking joints. These little design details make the SunwayFOTO stand out as a cut above typical tripods. As does it’s price, which is a around $220 as of this writing, so not as expensive as some higher-end carbon fiber tripods; it’s certainly not cheap.

The leg segments lock and unlock with a 180º twist at the feet. They utilize an internalized locking mechanism without individual locking rings at the segments, so extra care needs to be made if you attempt to retract an individual leg or segment, as twisting the outermost segment can transfer torque and unlock the previous segment. This makes adjustments on uneven surfaces tedious but this also makes deployment on normal level surfaces extremely fast.

I was able to unfold and depoly the tripod in under 19 seconds pretty much the first time without rushing it. And the leg extension and locking can be done essentially one handed. This makes this tripod ideal for guerrilla-style shooting where you have to get into position fast, get your footage an go.

The light weight, fast deployment, and compact size make this an ideal travel tripod or live event vlogging tripod. This will surely be my go-to tripod for my range videos and I’ll be sure to give those leg locks a thorough durability test in the near future.

This is available on Sunwayfoto’s website. Use this link and get 5% off using code: MOONDOG
https://sunwayfoto-store.com/?ref=pwwCNnfb

Sanag Multi-Adapter Powerbank

Anybody who has been out on a trip or stuck on location knows the utility of a powerbank to keep your devices running when you can’t plug in to recharge. But if you’ve ever forgotten to bring the correct cable for your device, knows the frustration of that moment. Thankfully there are powerbanks that come with built in charging cables and this Sanag is one of the most versatile in that respect.

I was sent a Sanag 10,000mAh travel powerbank to test and evaluate. It comes with 4 built-in cables: USB-A, Apple Lightning (iOS), Micro USB, and USB-C. The unit can charge up to 4 devices simultaneously using its various cables and plugging an additional cable to its USB-A port.

The cables are designed to fold almost flush into the shell. The shell is of the unit is black plastic with a unique faux brushed metal texture. This is both aesthetically appealing as well as practical as it provides a high-friction surface for a firm hand hold.

To recharge the unit, there is a Micro USB port next to the unit’s power button or you can plug its built-in USB-A cable to a standard USB port on a wall charger, computer, or charger hub. I discharged the unit and recharged it overnight. I recorded a total charge of 8156mAh to reach 100%, while this is approximately 1844mAh short of its stated 10k capacity, I suspect this is a safety shut-off on the unit, to keep the device from completely discharging.

This is available on Amazon through my Affiliate Link: https://amzn.to/3dgDX7N

Coliben TV LED Backlight Kit

I think it was Phillips or LG who first came out with LED backlighting in their flatscreen TV’s about a decade ago. I thought it was a novelty and for the most part, it never caught on with the general public. But now with the mass production of LED multi-color strip lighting, this feature can be easily and cheaply added on to just about anything.

I was asked to test out the Coliben LED backlighting kit for TV’s. Honestly, I didn’t have much interest in an LED backlighting system for my TV. It reminded me too much of Rice Rocket Tuners (cars). But I thought I’d give it a shot and see what all the hype was about.

The unit came in a graphic box without any branding or logo. Inside was the kit which included the LED strip inside an old-school 8mm film/magnetic tap reel. The unit had a small user manual which went over the controls using their App on your smartphone but it lacked physical installation instructions?

I did some Googling and looked at photos and videos of similar products and figured out the install process. The LED strips come in 4 segments, each connected with a short cable section which form the corners. The strips were self-adhesive on the back and the segments were to be applied to back side of your flatscreen. Depending on the size and design of your TV, the placement of each segment would vary.

The LED strip connected to a control box with a built-in camera on a stalk, which would hang over your TV and look back at the screen. The control box had 3M adhesive strips on one side but the design did not lend itself to securely attaching to the back of my TV (or at least not in the way I thought it should). I tried attaching LEGO bricks to the control box to try and secure it. But ultimately I ended up using additional double-stick adhesive gel strips to adhere the box to the back of my TV in a less obtrusive fashion.

The control box has two USB-A ports. You can plug in the LED strip to either. A separate 4.4mm jack powers the unit via a wall plug. The box has an on-off-reset button on the “front” but the unit is primarily controlled using a smartphone App. The manual did cover the calibration process and the App was fairly easy to use.

In use, the color lighting was fascinating but I did find it a bit distracting. In it’s “default” multi-color mode, the colors rendered were not 100% reflective of all of the colors in the TV screen. Black areas on video footage get translated into intense blue LED colors. Using the App, custom color pallets/moods could be selected. There were also Audio-Sync modes where the colors would pulse or change depending on the beat/sound heard by control unit’s build-in mic.

Initially, I wasn’t that keen in installing mood lighting in my house. But after trying it, I can see (literally) the attraction. The Coliben is an inexpensive way to enhance your video setup. But the install process wasn’t dummy proof and it has issues which can be resolved:

• Lacks clear installation instructions

• Control box design is not well thought out

• Unit should have been designed also run off a USB-C port and allow for connecting to a TV’s USB port.

• Colors not 100% true to the scene

• Requiring the installation of a smartphone App, along with the unit’s built-in mic and camera make me a little uneasy from a personal privacy standpoint


Products available on Amazon

Coliban LED Backlight Kit: https://amzn.to/3B6uKXM

Heavy Duty Clear Mounting Tape: https://amzn.to/3RR3OC7

Mechanical vs Electronic Trigger Gauge

When I first attempted to adjust the trigger on my CZ457, I wanted to know how light the trigger was so I could compare it after the trigger job. I went looking to buy a trigger gauge and my options were a modern digital trigger like the Lyman which was about $50-$60 or a Wheeler mechanical/analog trigger gauge was was about $20.

Since I wasn’t planning on adjusting or replacing the trigger on my CZ (or any of my guns) very often, it made sense to me to buy the cheaper Wheeler gauge. If I had more guns and more trigger jobs in my future, I might think otherwise. Recently when I got a chance to test a friend’s Lyman gauge, it got me wondering how accurate was my Wheeler?

The Wheeler black plastic tube with an approximately 8″ metal arm with an ‘L’ bend at the tip to grasp your trigger face. You pull on device as it pulls on your trigger. A metal spring housed inside of a plastic shell resists compression to a calibrated degree. When pulling on the gauge, the weight is displayed on the side with a yellow marker donating the maximum draw weight until you actively let off from pulling on the trigger.

My first test was to see if how accurately the Wheeler would measure a known weight. A full-sized can of Diet Coke contains 12oz of liquid and the empty aluminum can itself weighs about 0.5oz; so a full can should weigh about 12.5oz. The readings from the Wheeler displayed 1lb. That’s 3.5oz heavier than the actual weight.

I tested my 22LR Ruger Precision Rimfire rifle. It has a factory stock trigger, which can be adjusted from 5lbs down to 2lbs. I had adjusted it down to as low and I wanted to see if I had succeeded.

The Lyman gave me a reading average of 2lbs 1.4oz. The Wheeler gave me an average readout of about 2.25lbs. While slightly heavier than the Lyman’s reading, it is an acceptable margin of error for a simple-to-use tool that sells from 1/3 the cost of the Lyman. This may be an unacceptable for those who need a precision to a faction of an ounce for ELR shooting perhaps? But for the average shooter the Wheeler is close-enough and consistent enough to be a better value than the Lyman.

Help support us by buying this product through our Amazon affiliate link
Wheeler Trigger Gauge: https://amzn.to/3SMmIv0
Lyman Trigger Gauge: https://amzn.to/3AiAs9z

Lyman Digital Trigger Gauge

If you ever plan to install a drop-in trigger or adjust a trigger spring, it would be a good idea to test the results of your work. Did it actually improve your trigger pull as advertised. And in the case of swapping springs or similar modification work, did your work end up with the results you want. This is why you need a trigger gauge.

A few years ago Lyman introduced their electronic digital trigger gauge with a street price of around $50. A bit more than mechanical gauges but a lot cheaper than other electronic trigger pull gauges. I borrowed one from my friend to test and review.

It runs on two AA batteries and has an auto-off function when left unused for a couple of minutes, further extending battery life. It features a a built-in, extending trigger arm, which stows away inside the unit when not in use. It’s easy to use and has a clearly readable display.

But is it the most accurate? I weighed a full Coke can with a calibrated precision scale and it weighed a consistent 13.14oz. I used the Lyman to pick up the can I got an average reading of 13.5oz. So not as accurate as a dedicated scale but for my purposes this seems an acceptable margin of error.

Next, I tested my 22LR Ruger Precision Rimfire rifle. It has a factory stock trigger which can be adjusted up to 5lbs or down to 2lbs. I had adjusted it down to as low as it would reliably set.

The Lyman gave me an average reading of of 2lbs 1.4oz. Oddly, I did note that the numbers would shift slightly higher if I pulled on the trigger exceptionally slowly. Could the Ruger’s trigger have a variable weight depending on pull velocity? This bears further study at a later date.

All in all, the Lyman is a super easy and convenient piece of equipment. Is it worth $50? Yes, I think it is but it depends on how often you think you will need to adjust or change your triggers on your firearms. Though the claim of being the “World’s most accurate trigger gauge” remains unproven.

Help support us by buying this product through our Amazon affiliate link
Lyman Trigger Gauge: https://amzn.to/3AiAs9z

iSKEY USB-C Mag Adapter

I love USB-C as a standard except for two things: One, I wish it would have come sooner, like decades sooner. Being able to insert it correct-side-up every time is such game changer. Two, for the main power cable on a laptop, its potentially damage prone from accidentally forgetting to unplug it before moving it. My wife in particular has destroyed more than one USB cable this way (and we have young kids so not always her fault).

Apple solved this problem over a decade ago with the introduction of the MagSafe power connectors with their magnetic attachment points. An accidentally yank or trip over the a power cable would easily detach the cable, rather than pulling the laptop crashing down from a table to the ground. But in 2016, Apple laptops have switched USB-C/Thunderbolt ports as their primary data and power connection standard.

Thankfully 3rd party peripheral makers came up with a solution that adds MagSafe safety and functionality to USB-C. First introduced in the phone market, these adapters come in 2 parts. A USB-C insert that fits into your device with a magnetic end that connects to a magnetic adapter end that either connects to a USB-C cable or is part of a cable itself.

Unfortunately, some of these early models were simple adapters that only transmitted power and not date. And some were designed for phones and didn’t have the capacity to handle the higher wattage and amp requirements of a laptop. But if you search today you’ll find models that can handle 60W or more and also transmit data.

The iSkey (don’t ask me how it’s pronounced, I suspect something akin to a pseudo-Slavic sounding name?) 20-pin USB-C magnetic power adapter with a right-angle connection so that your USB-C cable is angled out of the way of your other port. In my testing, I found that it changed my wife’s 2019 MacBook Pro 16″ with a peak power throughput of 90W using my USB digital tester. I could also transfer data from my phone at a rates over 100Mb/sec.

It is a +$20 adapter which makes it a bit pricier than other adapters but many cheaper ones don’t promise up to 100W power or 40GB/sec data throughput. However, it is not perfect as the adapter does partially block the the neighboring port on the Macbook. Certain thinner USB-C connectors will be able to fit but this could cause a problem for some. In the box, it also comes with a small, green plastic tool to assist you in pulling out the male end of the adapter but the magnetic end may be strong enough to extract from your port of pulled directly out and slowly.

BUY IT


Amazon affiliate link to iSkey https://youtu.be/Ozf5PY-AzEk

Same device sold under the Redbean brand: https://amzn.to/3yKwEQB

Blavor Solar Charger Outdoor Test

A few months ago I tested a Blavor 10,000mAh solar charging power bank and discovered that it took over 130 days to full recharge using sunlight alone. Some of the feedback I got on these series of testing video was that the reason it took so long was because the solar panel was indoors behind a window.

While I am aware that clear window glass does filter out some sunlight (especially UV). But glass does not reduce the power output of a solar panel by as much as some claim. Many outdoor solar panel arrays are covered in glass to protect them from inclement weather.

But to prove my point, I conducted a revised test using the same Blavor solar charger I tested previously. I placed outdoors on my windowsill facing almost directly upward. Exposed to direct sunlight (and the weather) for 7 days to see if I could detect any improvement in charging speed.

I started the test with the battery at 1/2 full as this seemed take the longest to make progress in my earlier tests. I checked the device 7 days later and found no change in the charge indicator. So I left the device to charge an additional 3 weeks (a total of 35 days) and checked it and found, no change. I have no intention of waiting another 100 days to see if charges any faster. To my satisfaction at least I believe this proves my point that the window didn’t make much or any difference to the outcome of my earlier tests.

Teslong NTG500H Borescope

Teslong sent me their TS NTG500H rifle borescope kit to test and evaluate. The package comes in a long padded box containing the ≥26″ long wand/probe, a USB-C charging cable, a USB-C video cable, a USB-A/Mini video cable, a display monitor and video recorder (with a 32GB SD card), and a set of 4 right angle adapters for various rifle calibers:

(5mm) diameter for .22 caliber & larger
(6mm) diameter for 6.5 Creedmore & larger
(7mm) diameter for .30 caliber & larger
(8.5mm) diameter for .38 caliber & larger
(12mm) diameter for .50 caliber & larger

The display monitor also functions as a recording device able to take still photos and video in 720p. Using the USB-A/mini adapter cable, you can connect the wand directly to a tablet or PC. I attempted to test it on my Samsung S21+ phone but was greeted with an Android warning message saying USB video was disabled, which was more of an issue with the 3rd party endoscope App I had downloaded than this device.

The wand/probe has .20 cal diameter allowing it to be used with tight bore .22cal rimfire rifles. The wand has etched inch markings along its length and a white washer plug that help you mark the depth of the probe. This helps you more easily note and return to a specific area of interest in your barrels such as deposits, burrs, and cracks. The rigid wand does make controlling the direction of the probe much easier than non-rigid endoscopes I’ve used.

The video taken with the display was quite good, comparable to other borescope/endoscopes I’ve owned. Not having to download dodgy 3rd party App software on my phone is a plus. It has a built-in rechargeable battery and even a built-in flashlight should you need it.

The unit is a bit pricier than similar borescopes or Teslong’s non-rigid endoscopes. I would have liked a 1080p camera but this may be unnecessary since the tiny sensor at the end of the probe may not actually record details higher than 720p, a larger 1080p file may be over-sampling.

A common issue with new users are complaints of an out-of-focus image. This borescope (and many others this small) are not an auto-focus camera. The focus must be manually adjusted by the user by turning the right-angle mirror to the appropriate number of turns onto the wand. This will vary depending on the size of the barrel. The user must adjust the mirror and lock it in place with the tiny locking ring at the end of the wand. One revolution either way could mean the difference between a blurry mess and a tack sharp image.

Not only are they useful for cleaning and maintaining your new firearms but could be invaluable in evaluating a vintage or collectable C/R rifle. Seeing the condition of the inside of a barrel could mean the difference between paying for Field Grade and paying for Display Grade.

Support this website by purchasing this product through my Amazon affiliate link: https://amzn.to/3S2oYhm

Joyroom 72W Car USB Charger

Joyroom sent me their 5-port USB 72W car charger to test and evaluate. This charger plugs into a standard car lighter port and provides 5 USB ports of up to 12V of power (3 x USB-A and 2 x USB-C ports). The 3 USB-A ports are QC 3.0 compatible which means you can quick charge Samsung and Apple devices. In my casual testing on my Samsung S21 which had a 30% battery charge, I was able to draw a ≥2000mA current through each of the ports. This would allow me to fully charge my phone in about 10 min.

The unusual feature of this charger is that the charging ports are split between the main cigarette plug (2 x USB-A and 1 x USB-C) and satellite clip-on charger block connected by an integral power cable (~length of 4ft). The allows you the flexibility to provide passengers in the rear seats USB charging. A boon to any parent with kids with power hungry devices (like a Nintendo Switch). This is an especially useful when traveling as compact and budget rental cars rarely have rear USB charging ports.

This unit is available on Amazon through this Affiliate Link. Any purchases made through this link support my efforts to review new products. Thanks. https://amzn.to/3ImTGO1

Rexmeo Biometric 2 Gun Safe

Biometric gun safes used to be the realm of spy-fiction and the well heeled. But now, they’re not only widely available, they’re also affordable. But a quick glance of some Amazon 1-star reviews of budget gun safes talk about their weak locks and unreliable biometric security.

A Chinese marketing company contacted me to ask if I would test and evaluate a Rexmeo biometric gun safe, a brand I’d never heard of. Upon initial inspection I was surprised at the weight topping 15lbs. This didn’t appear to be to be some cheap, thin-skinned lock box.

The unit comes with 2 sets of keys to open the box. Inside it has a enough space to contain 2 full sized pistols and a fair number of spare magazines and/or accessories (or a single pistol with a hard case holster depending on the model). The interior is padded with foam to protect its contents and has cut-outs to allow the safe to be securely screwed into a wall or furniture. The unit comes with a cable lanyard and pass-through hole to allow it to be secured to a post, pipe, or vehicle seat.

Activation was straight forward, you open the safe with the keys. Insert 4 x AA batteries (included) and following the instructions, you set up your finger to be read by the biometric sensor circle on the top of the unit. The unit requires multiple contacts with your finger to set up but once read, the unit would only open with my right thumb. I attempted other fingers and my left thumb but none of them would activate the lock.

Impressively the unit can store up to 50 different fingerprints! Not only could you use all 10 of your fingers but you could also allow access to other individuals through their fingerprints. I wonder if more fingerprints degrades the specificity of the biometrics (allowing for less precise biometric activation?)

Upon opening a digital voice informs you that the unit is unlocked. You can disable this voice but turning off the sound output. But this can lead to unintended issues as I’ll get into.

The unit also has a password entry through a 1-6 number keypad on the top of the unit. The unit allows for passwords between 6-8 numbers as well as adding non-opening scramble codes. When the correct passcode is entered the biometric sensor turns green and opens the safe. My initial unlocking occurred without issue but later in testing I ran into a troubling series of “wrong password”, the unit signaled a red light and would not open.

I discovered that this was because I was pressing the keypad buttons too quickly. The keypad required about a 1-second press per button to register correctly. When I had the Digital Voice/Sound on, I could get audible cues when a button was pressed correctly, when the Voice/Sound was turned off there was no positive feedback.

This degree of user-error in the interface could give some gun owners pause. But I consider biometric or electronic locks a secondary rather than a primary entry method. Think of it is a standard key-entry gun safe with biometric backups.

The makers did include some clever features to make the battery power less of an issue. The unit has a low-battery audible alert and if the batteries completely die, there is a USB-C port next to the key lock which allows you to power the biometrics or keypad through a powered USB cable. In addition, the unit claims to have a pick-lock alarm though I was not able to test the mechanism of how the unit knows the lock is being physically picked?

The safe could also be improved with some additional changes. I wish it had a way to turn off the annoying digital voice while retaining the keypad beeps at a lower volume. It could use an automatic red LED light to illuminate the interior contents when opened like with some other safes by Wincent and Vaultek. But for the price, the Rexmeo is a solid gun safe with generous interior space that most gun owners.

Available on Amazon through my affiliate link: https://amzn.to/37Yz1lC