
In addition to making excellent rifle scopes, Riton has come out with some light, high-performance hunting spotting scopes. And an innovative binocular with a double-hinge design.
Category Archives: Product Reviews
Gadget, gear, and technology
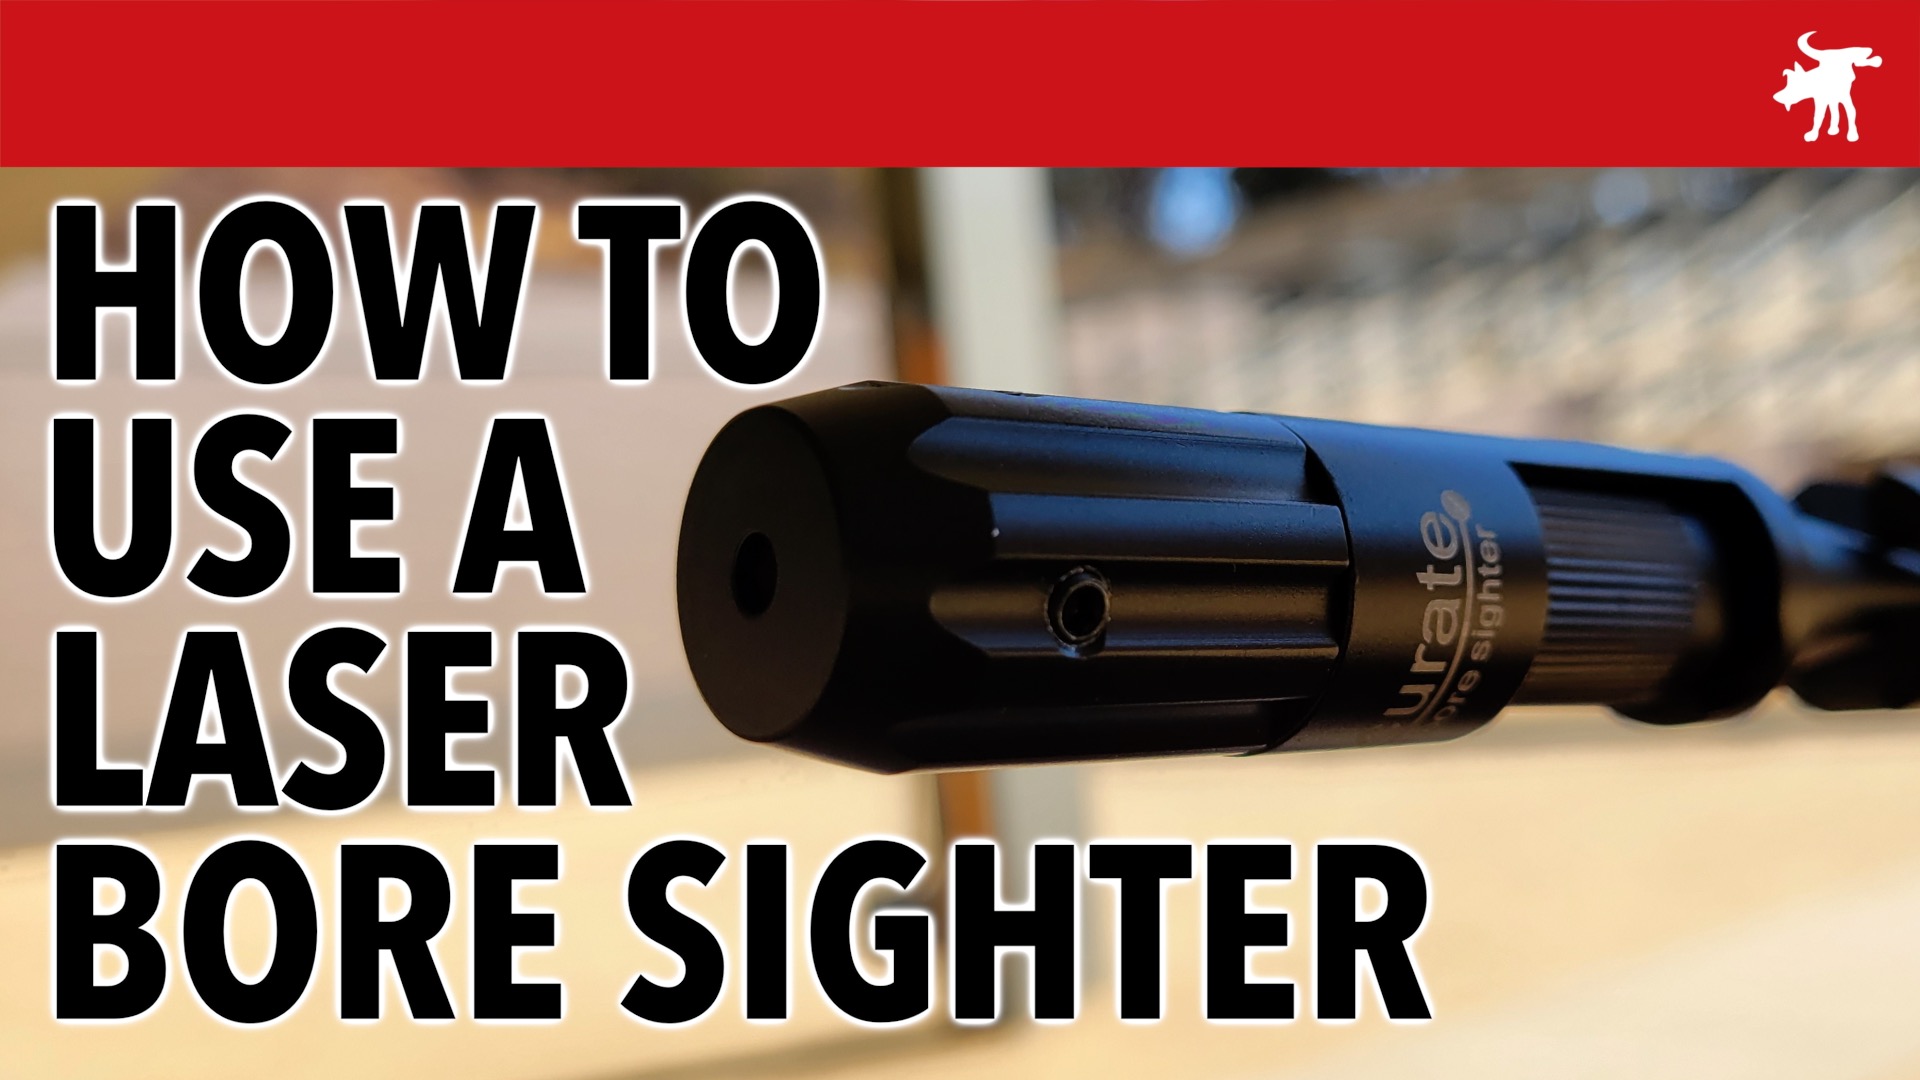
How to use a Laser Boresighter
In my previous review of the Wolfroad green laser boresighter, some of the comments I had doubted the suitability of the device because it wasn’t spot-on when installed. In this episode, I show how to use a bore sighter to sight in a scope, optic, or open sights.
Laser bore sighters, which fit into the muzzle of your barrel, are not 100% dead nuts center on your bore. There’s a certain amount of looseness in the tolerances, from the laser diode to the straightness of the stem, to threads of the screw on the caliber adapter. It’s normal that they’re just a few degree’s off.
But by using a little practical geometry we can get around this imprecision. By rotating the bore sighter while attached to your barrel, the laser dot traces a circle around the center of its axis; your barrel. You can either estimate the center of that circle or simply position the dot at the nadir of the curve, you can aim the vertical/elevation centerline with your barrel.
This will almost certainly get you on paper if nothing else. Once you get holes on paper you can make finer adjustments to zero your sights.
WOLFROAD BORE SIGHT KIT
https://amzn.to/3t8CBle
MIDTEN BORE SIGHT KIT
https://amzn.to/3JSQc61
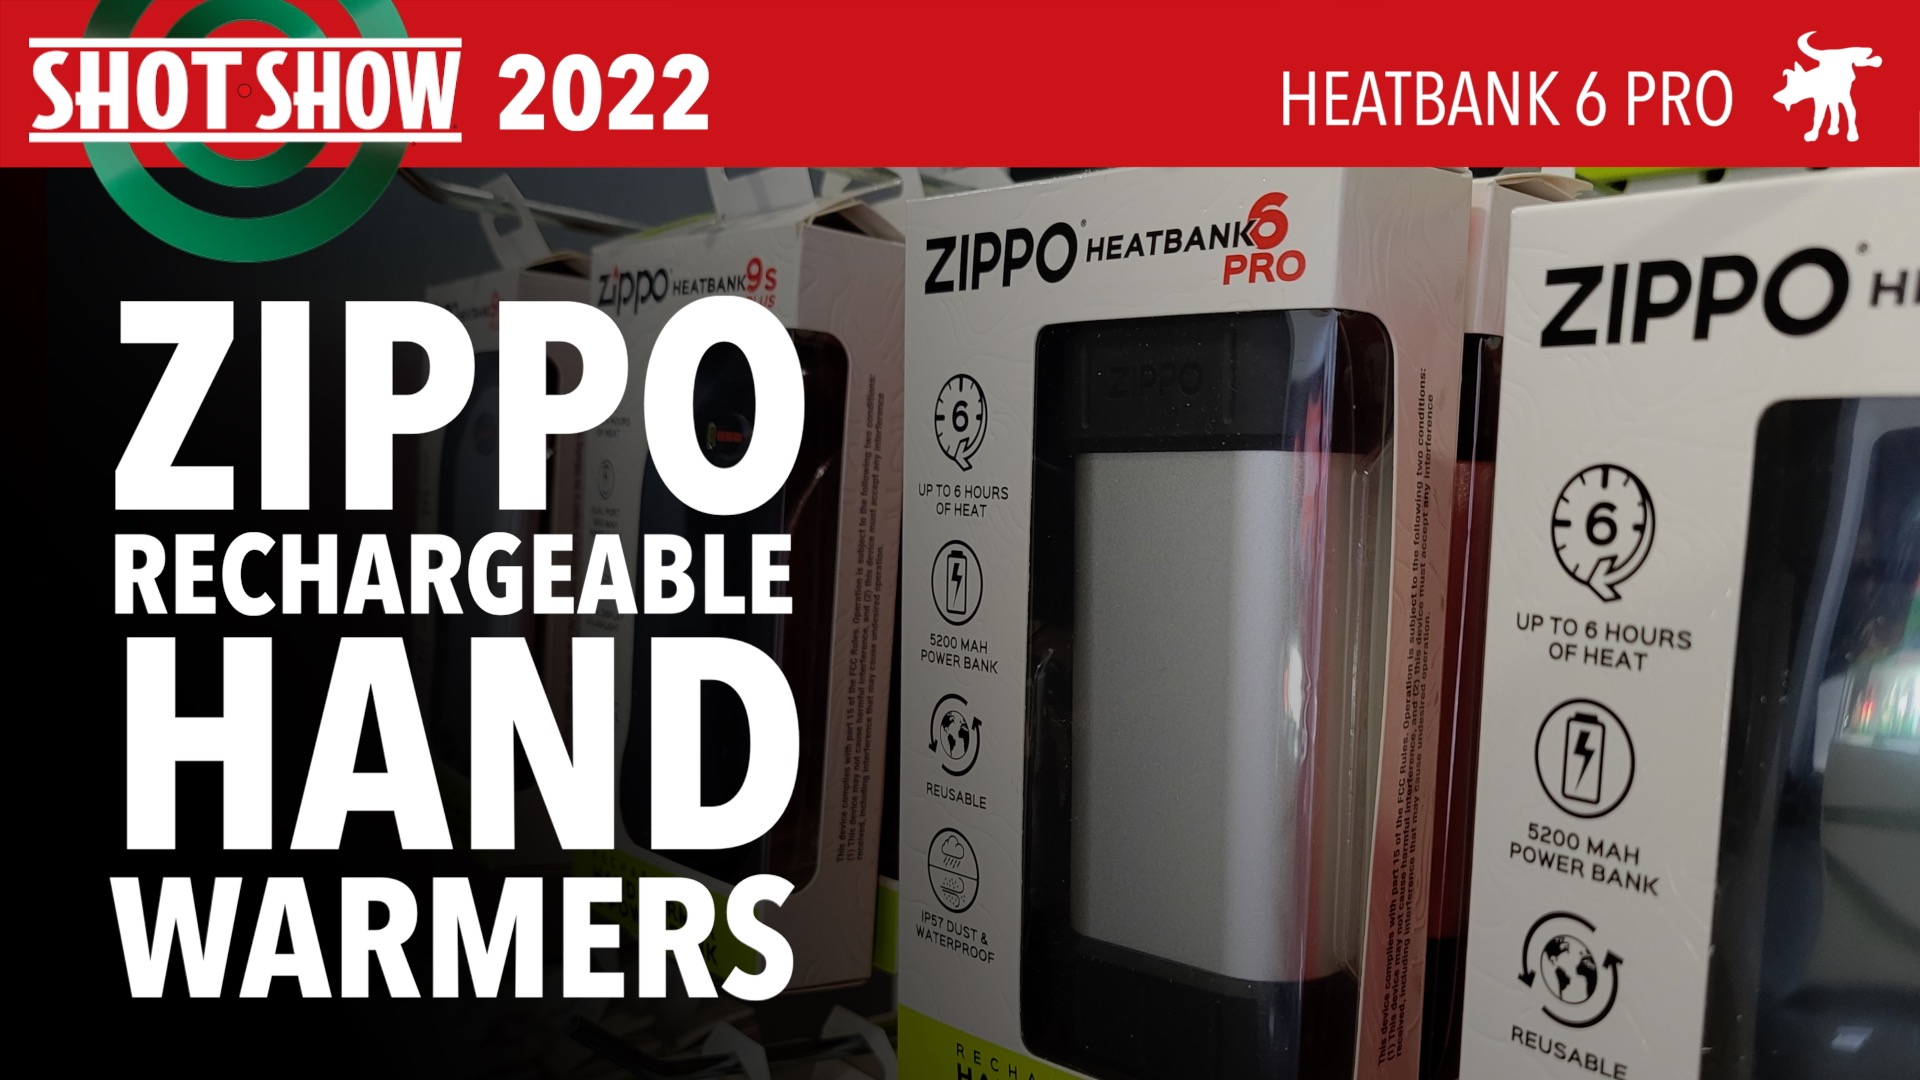
Shot Show 2022: Zippo Heatbank 6 Pro
I was a bit surprised to see Zippo at Shot Show but when I thought about it, they are a brand closely related to the U.S. military history and for most of the 20th century, were as much a part of a guy’s every-day-carry as a pocket knife.
I’m guessing most of the orders they took at the show were for custom logo editions of their iconic lighter. When I asked what “new” products they had, I was shown their newest electronic hand warmer. It’s MSRP is over $50 which is a bit pricy for a 5200mAh power bank (typically hi-capacity power banks are 10,000mAh or more). I’m not convinced that their brand halo justifies premium pricing on a unit that doesn’t appear as physically unique as their lighter?
Available on Amazon
https://www.amazon.com/dp/B091B4FYRL/ref=emc_b_5_t

Olight Baldr Pro R
GET 10% OFF THE O-LIGHT STORE
CODE: “MOONDOG10”
https://shrsl.com/3bts9
ALSO AVAILABLE ON AMAZON
https://amzn.to/3eBUYqk
Olight sent me a Baldr Pro R to test and evaluate. Taking it out of it’s packaging, I noted that it looked very much like my Valkyrie PL-2 albeit with a magnetic charging/control pad and without a battery door latch. It is approximately 1/2″ longer than a Valkyrie PL-2 and about 11g heavier at 126g.
The Baldr Pro R differs externally from the older non-rechargeable Baldr Pro which has its laser designator unit encased in housing below the main light. The newer R-model is a much more elegant design with the laser internal to the unit with only a small hole in the flashlight bell from which the laser beam emerges.
It shares identical main controls with both the Valkyrie and Baldr Pro. Two button/pads at the rear of the unit can be actuated by an index or middle finger of either hand. A quick double-tap switch the light from high and low output. Strobe mode is activated by simultaneously pressing both control buttons. A control ring near the crown of the unit, switches between light-only, laser and light, and laser-only modes.
It fits a standard Glock pistol (and pistols with a similar accessory rail), with a Glock (GL) sized cross-bar pre-installed on the mounting base. This cross-bar can be replaced with a Picatinny 1913 sized bar for more exacting fit on that mounting system but the standard GL cross-bar is compatible with Picatinny slots. I particularly like the O-lights latching system as it provides much faster mounting and detaching than either a Streamlight or Surefire taclight.
Conducting my home-made lumen testing, I usually let a light warm-up for 1-minute before starting my tests. Initially my readings placed the output at around 1880 lumens! But I discovered that after a little more than a minute, the Baldr’s output would drop and stabilize at around 680 lumens. I repeated my tests and noted the same drop at approximately 1-2 minutes of running the light on high mode. I hypothesized that the unit may have over-heating safety built into it as the unit was getting quite hot.
I contacted the Marketing Rep at Olight and she shared with me a chart from their engineers showing that at High mode, the device would go from 1350-500-300 lumens. Upon checking the manual, sure enough the performance diagram showed that a fully powered unit output 1350 lumens for only 1.5 minutes before it stepped down to 500 lumens for the next 40 minutes of run-time before dropping to 300 lumens for the final 13 minutes.
So the Baldr is really a 500 lumen light with a brief over-drive mode of 230% and not truly a 1350 taclight. Unfortunately this is an all-too-common marketing ploy by flashlight companies nowadays. That’s why you can’t take the lumen numbers at face value or at least look at the fine print (the Baldr’s packaging says 1350 Max Output),
In all other respects the flashlight worked flawlessly. The built-in green laser was bright and I could see it clearly at 120ft away at night. The laser can be turned on in conjunction with the light and easily seen in both high and low flashlight modes (though more easily in low). Checking with a laser bore-sighter, the unit was also perfectly sighted to my Glock 17 when I first mounted it; the laser can be adjusted for both windage and elevation with the included hex wrench.
Despite the misleading lumen numbers, I am impressed with the overall ergonomics and build of the Baldr Pro R. I’ll be mounting it on my personal sidearm (Glock 17 Gen3) for long-term testing.
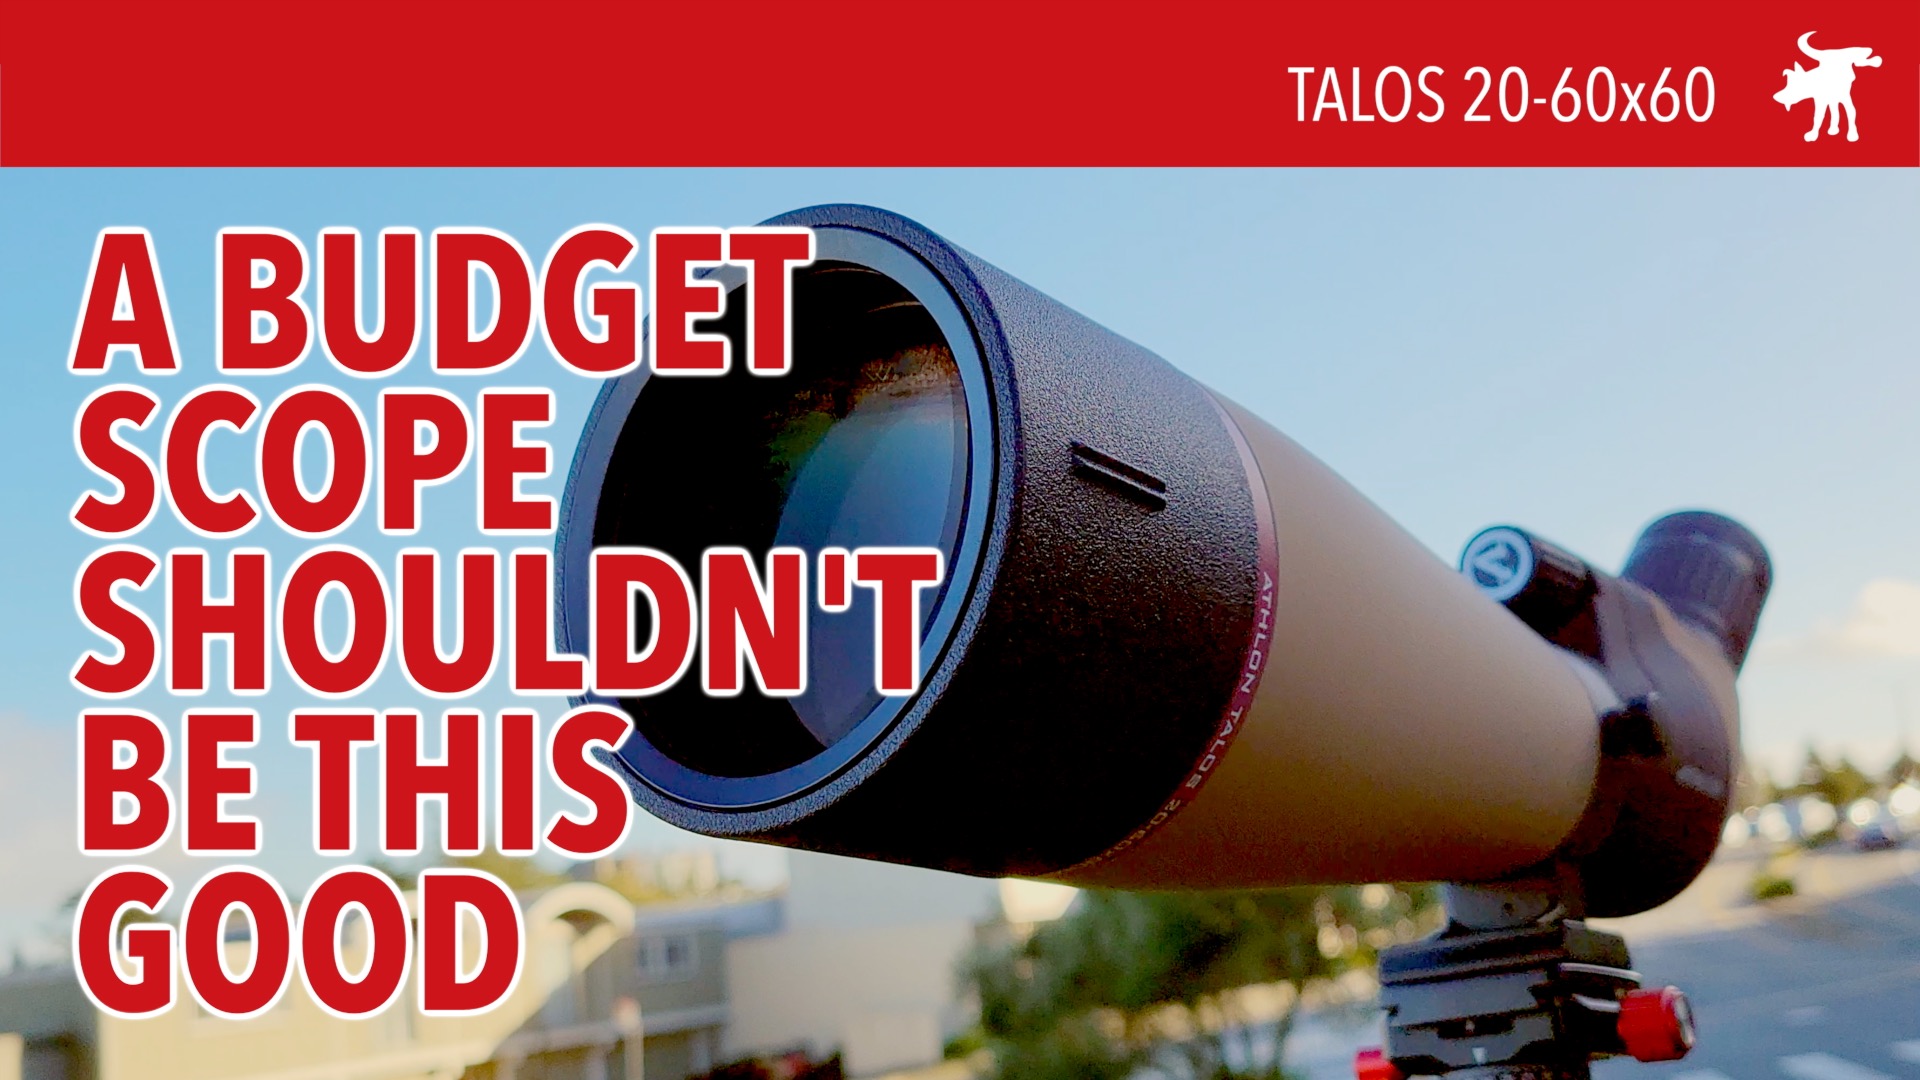
Athlon Talos 20-60×80 Spotting Scope
The Talos 20-60×80 spotting scope is made by Athlon, a rifle-scope brand that offers a better value than Vortex (and considering Vortex’s recent QC issues, you may even say better). With a street price of only $130-$140 the Talos is Athlon’s cheapest spotter. In this video review, I present whether this spotter is a value or a did Athlon sell out and simply slap their logo on a generic Chinesium scope?
The package comes in a soft-lined black nylon fabric case with a split compartment. Above the scope compartment I found a generic straight leg tripod common with other budget spotting scopes I’ve reviewed such as the SVbony SV28. Despite the simple and inexpensive design, these tripods tend to be quite rugged and stable.
The scope appeared to be well made with no faults or gaps in the seams. The outer surface wage largely covered in a rubber-like coating for weather protection and for improved grip. The front and rear lens caps were rubber and non-captured.
The integrated sunshade had a nicely textured coating and what appeared to be a sight notches, presumably to help you eyeball aiming the scope. The eyepiece has a built-in, twist-up eye cup. The tripod mounting ring allowed the body of the scope to be rotated to allow flexibility in viewing the scope from different mounting positions (eg. bench, hung, etc.).
The eye relief was fair and focusing knob buttery smooth. The magnification was a bit stiff but the ring was also smooth. The power ring rotated independently of the eyepiece to allow for easy mounting of a camera, though the rotating eye-cup does limit the positions of a camera mount.
The optics were bright, offering high contrast, resolution and saturation. In my 100yrd range tests with the USAF resolution chart, at 60X I was able to resolve element #5 in Group “0” which is highest resolution optic I have yet tested. This is remarkable for a scope which retails for less than $150. While it is largish scope at 16.5” long, for those needing to do extreme long range precision spotting (100yrds) this is a great value option.
Available on Optics Planet: https://shrsl.com/3c5wh
and Amazon https://amzn.to/3H86wxH
RESULUTION TEST
Group 0 : Element 5

Liberfeel Wireless Powerbank
The Liberfeel is a 10,000mAh wireless powerbank sent to me by Peakode to test and review. It has a decidedly feminine aesthetic with rounded edges somewhat reminiscent of a bar of Dove soap. It comes in a choice of 4 pastel colors: pink, blue, purple, and beige.
It features a wireless fast-charging plate (it will only fast-charge if wireless charging only 1 device) with a built in magnetic to help keep your phone in place while charging, though not strong enough to keep a phone attached to the charger if held up sideways. In addition it has a built-in Apple Lightning, a USB-C charging cable, a USB-A output port, and a USB-C in/out port, allowing it to charge up to 5 devices simultaneously. It can also recharge itself via it’s USB-C port, while charging 4 other devices at the same time. This makes the Liberfeel a useful travel charger.
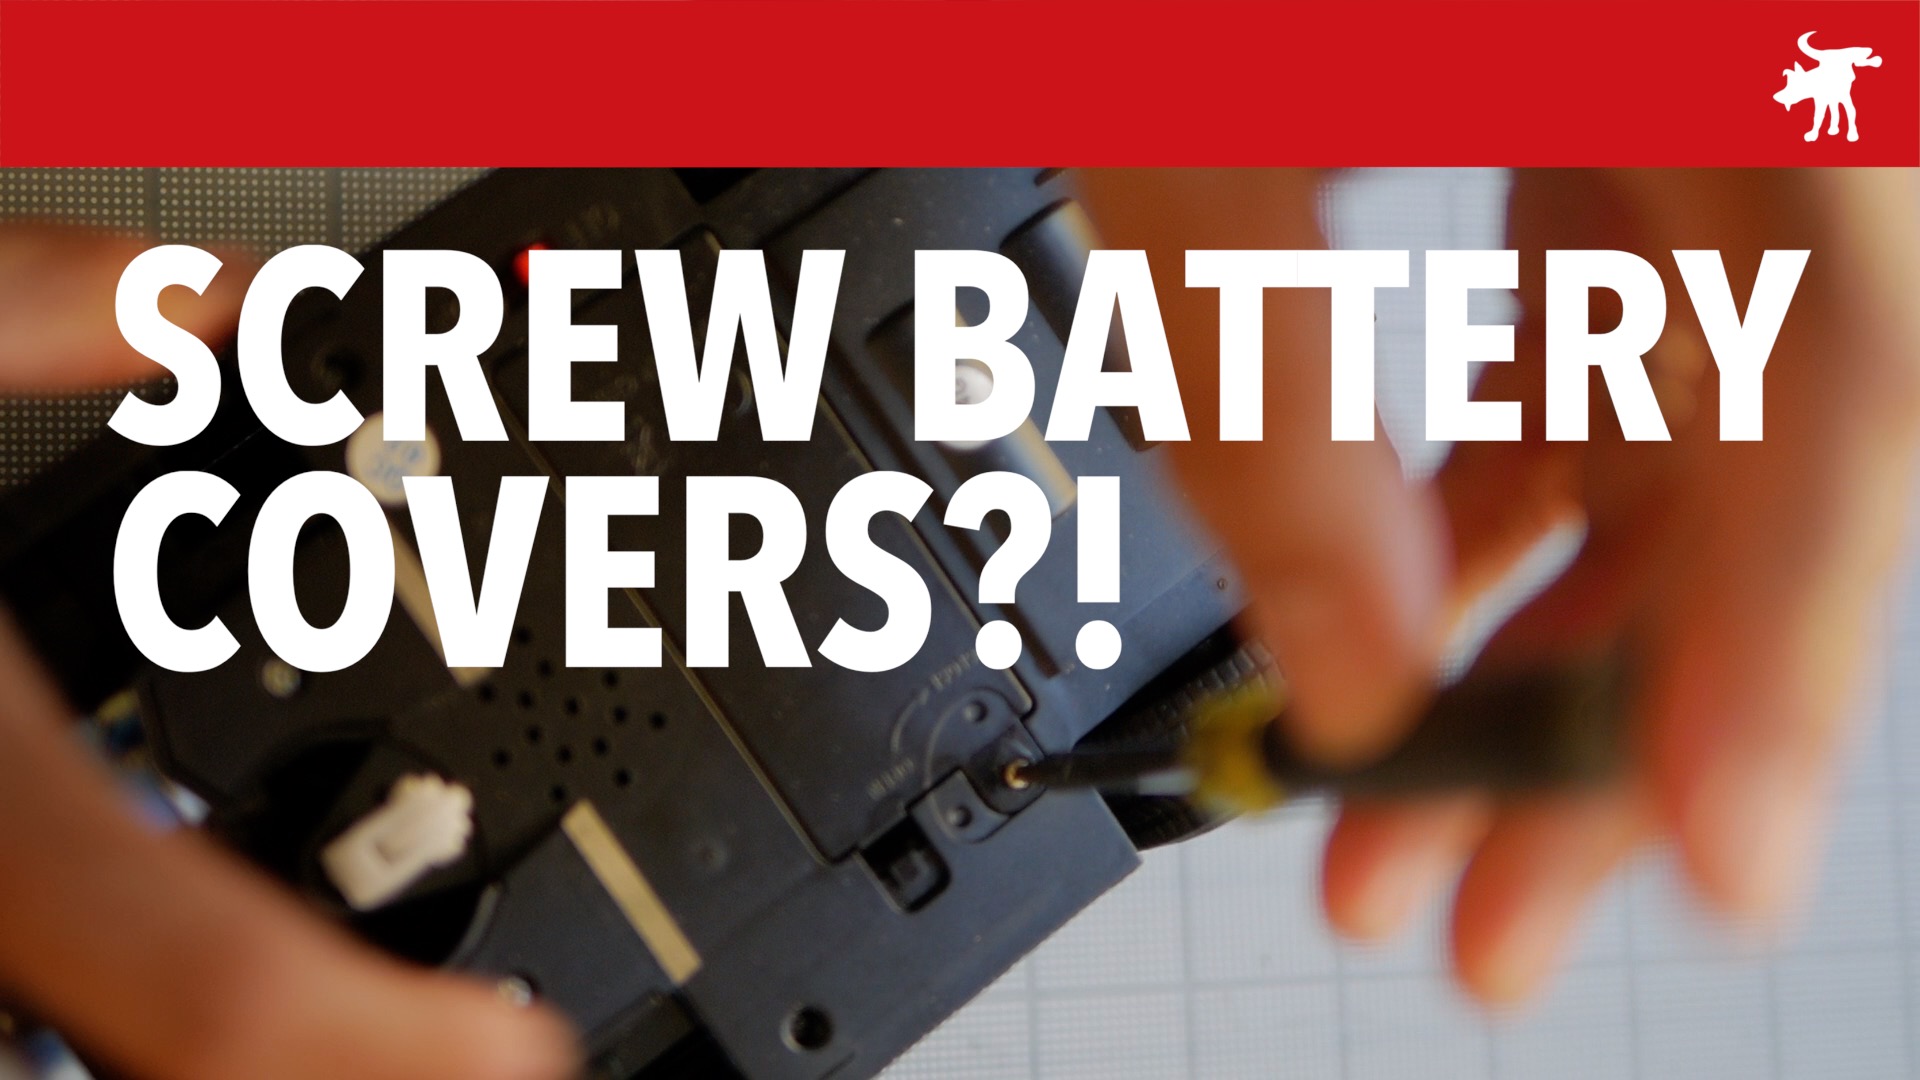
Screw Toy Battery Covers
Every toy that requires batteries nowadays has an annoying screw, locking down the battery cover. Even if the battery cover has a latch or hinge that will keep the battery in place, they add a screw to the door! Every time I have to replace the battery, I have to remove the screw or leave off the screw entirely next time (as I think many of you probably do).
I mostly see these on kids toys or devices. So I assume it’s a regulation to keep kids from getting into the batteries. I’ve searched the interwebs and have only found a regulation requiring a child protection mechanism for devices that use ‘button’ batteries; not the AA/AAA cells that power most kids toys.
I created this video to rant about this issue and hope that somebody can share a link to a specific US consumer product regulation.
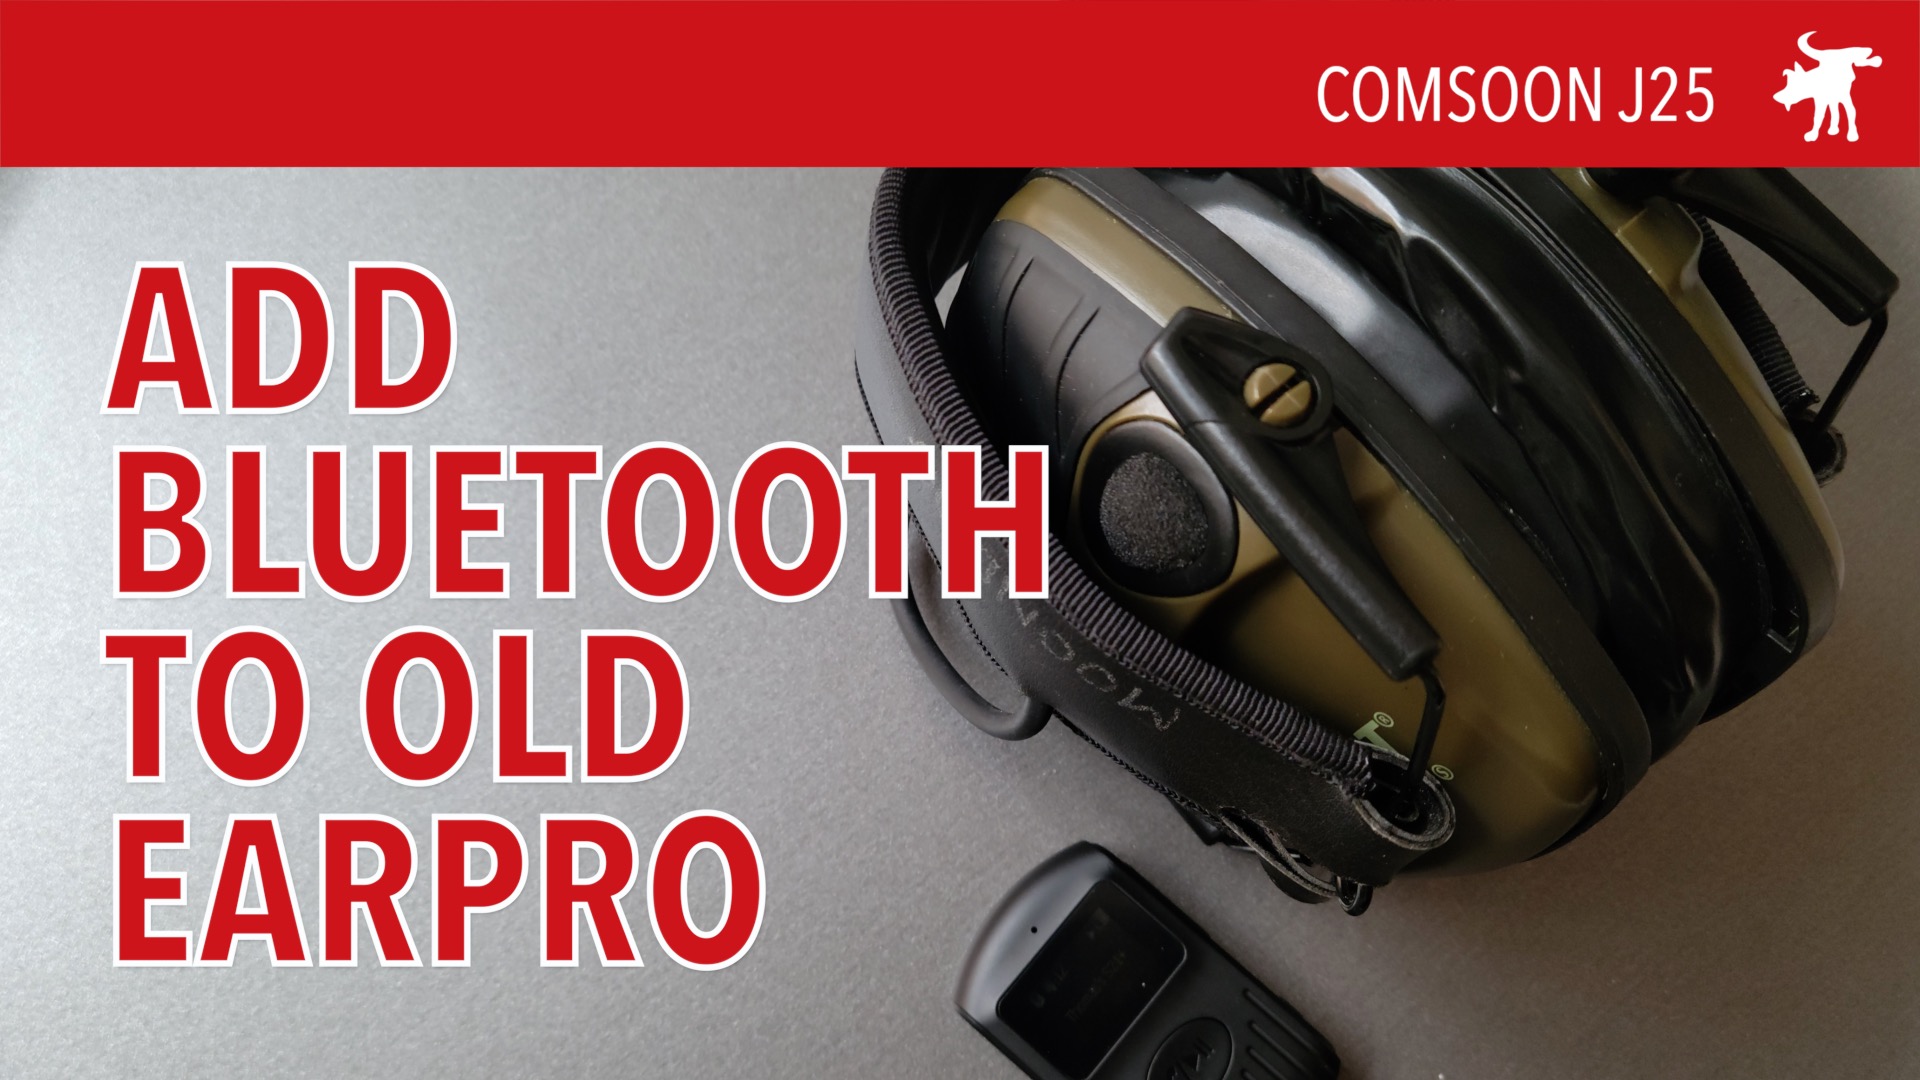
Add Bluetooth to your old Earpro
Comsoon J25 Bluetooth Receiver allows you to add Bluetooth audio to your old wired headphones or earbuds or your car through its AUX audio port, for less than $20. Far less than the cost of a new pair of Bluetooth headsets or even the cost of a J25 and a new pair of non-Bluetooth earpro.
It’s small enough to mount directly onto your earpro and with the right connector cable, you can get the firing tucked away and even make it look like original equipment.
PRODUCT LINK
J25 https://amzn.to/3k6wWWJ
Right-angle cable https://amzn.to/3nZr04N
Velcro dots https://amzn.to/3CVEl2s
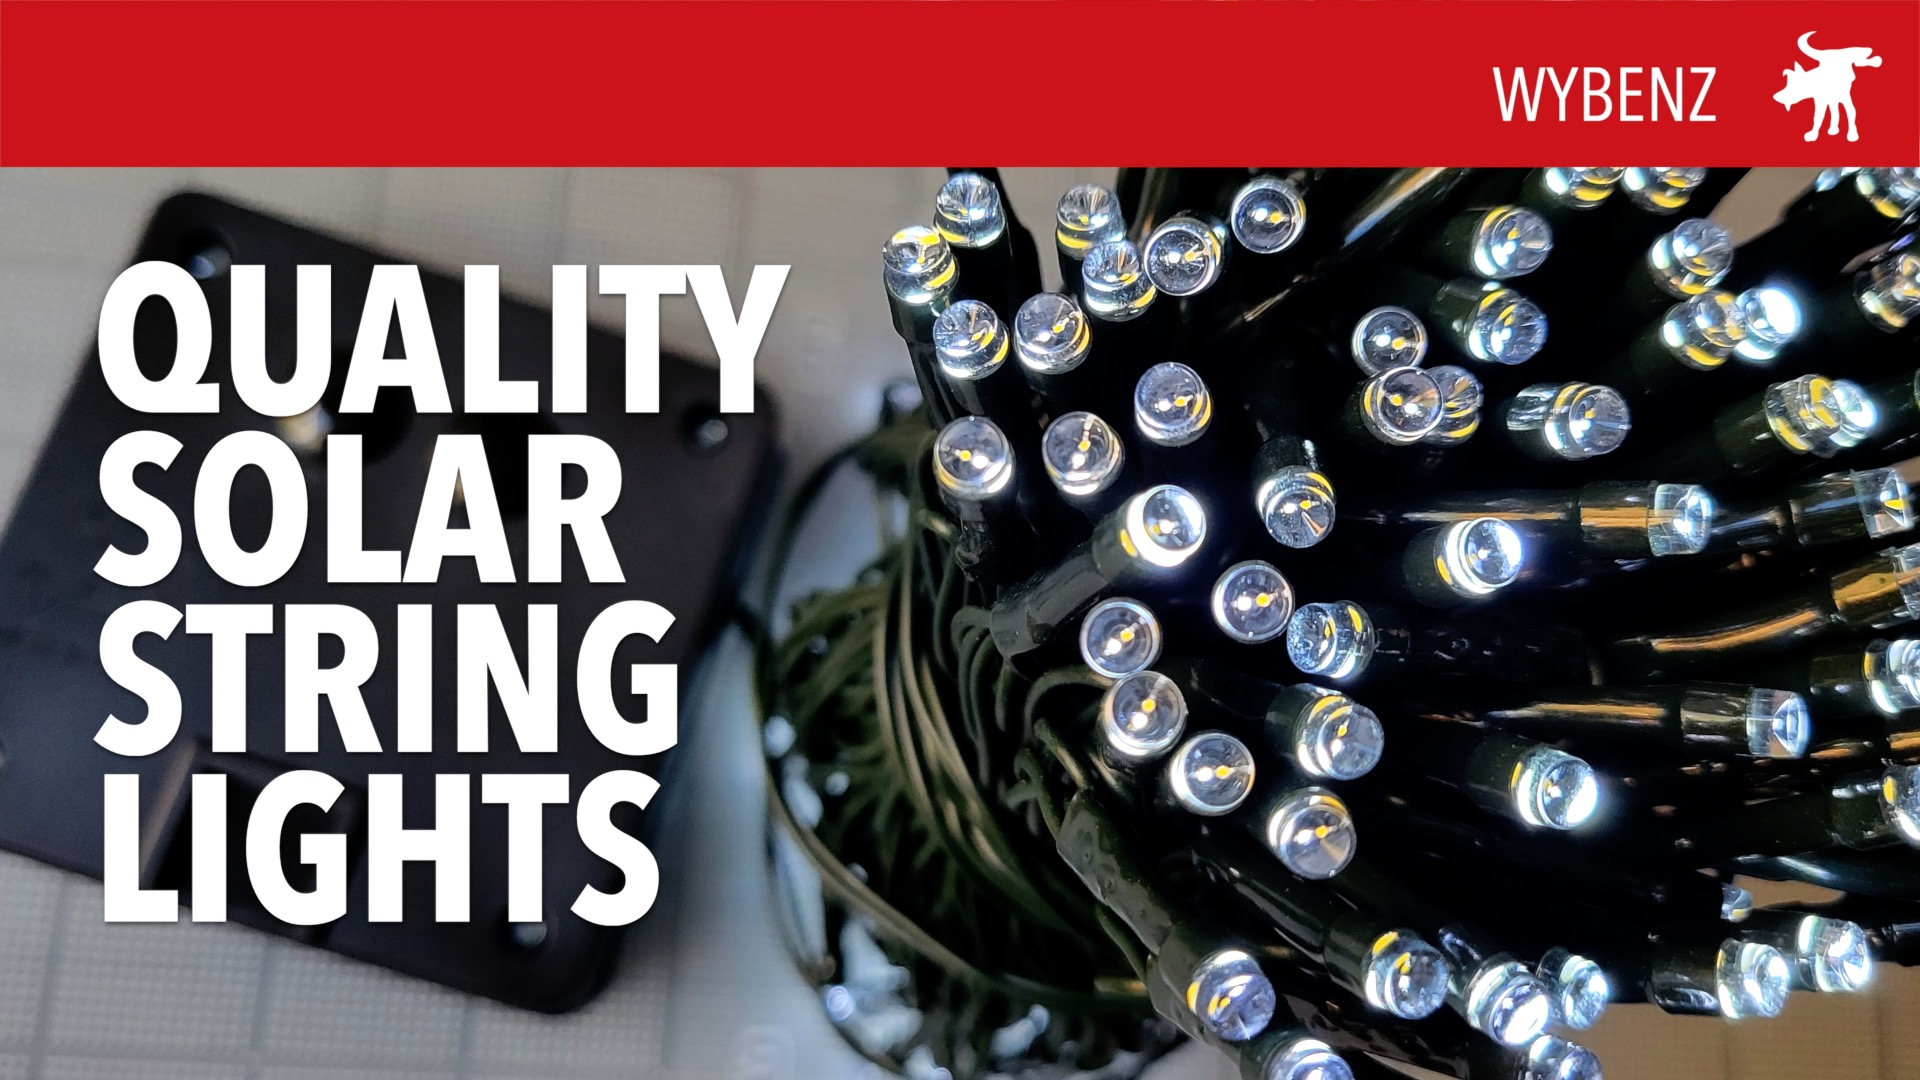
Wybenz Solar Christmas Lights
WYBENZ sent me a set of Solar Christmas String Lights to test and review. I own a similar set solar-powered lights but these have much heavier duty wiring. These look quite nice and beautify our exteriors without having to be plugged. This makes them much more versatile in where you place them around your house.
SPECS
- Length: 66ft
- Control Wire: 6ft
- Strand LED: 200
- Setting Modes: 11
- Battery Capacity: 1200mah
- Waterproof: IP65
- Solar Panel: 2V 400MA
- Working Time:Up to 15hours
MODES
- Steady On White
- Steady On Warm White
- Steady On 50/50 Mix White and Warm White
- Slow Flash White
- Quick Flash White
- Slow Flash Warm White
- Quick Flash Warm White
- Slow Alternate White to Warm White
- Quick Alternate White to Warm White
- Slow Flash 50/50 Mix White
- Quick Flash 50/50 Mix White

A2 PG Grip Plug
Missouri Tactical sent me two of these grip plugs to test out. It allows you to convert any Ar15 MilSpec A2 grip into a handy storage space. It features a storage holder for a CR2032 or similar sized coin battery and a hole for a small allen/hex wrench. This is very useful if you run illuminated optics or red dots because it’s all too common to forget to turn them off and you end up with a dead red dot.
It comes in either black or FDE colored silicone.
Available on Amazon
Black https://amzn.to/3roNPRx
Tan https://amzn.to/3D8qEgL