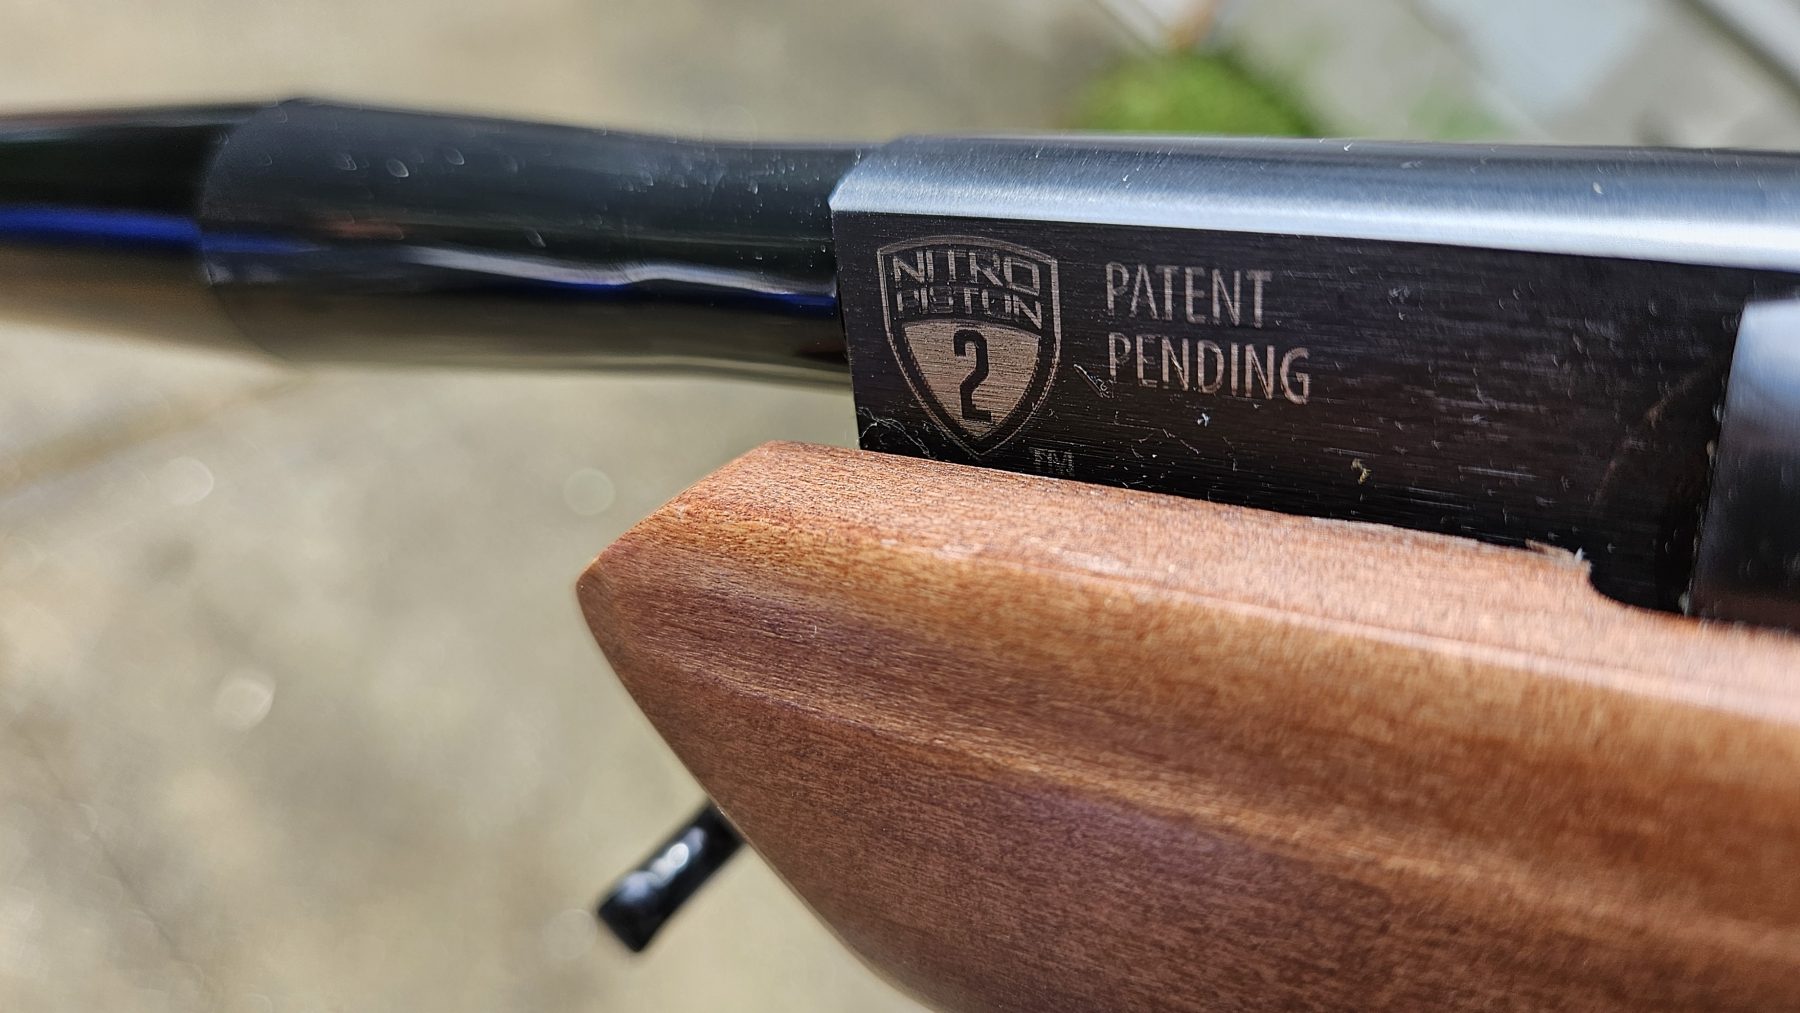
Break barrel air rifles are notorious for destroying scopes. Scopes are designed to withstand the recoil of a rifle. The ignition of the cartridge propels the bullet out the barrel, with the hot gas and physics of the reaction, sending the rifle and scope back into the shooter’s shoulder.
Break barrel air rifles on the other hand, are not firearms. Instead, a compressed spring is released, pushing a piston forward into a cylinder, sending compressed air and a lead pellet to the target. The rifle and scope experience two recoil impulses one after the other in opposite directions. This back-and-forth voilence shakes scopes in directions most were never designed to move.
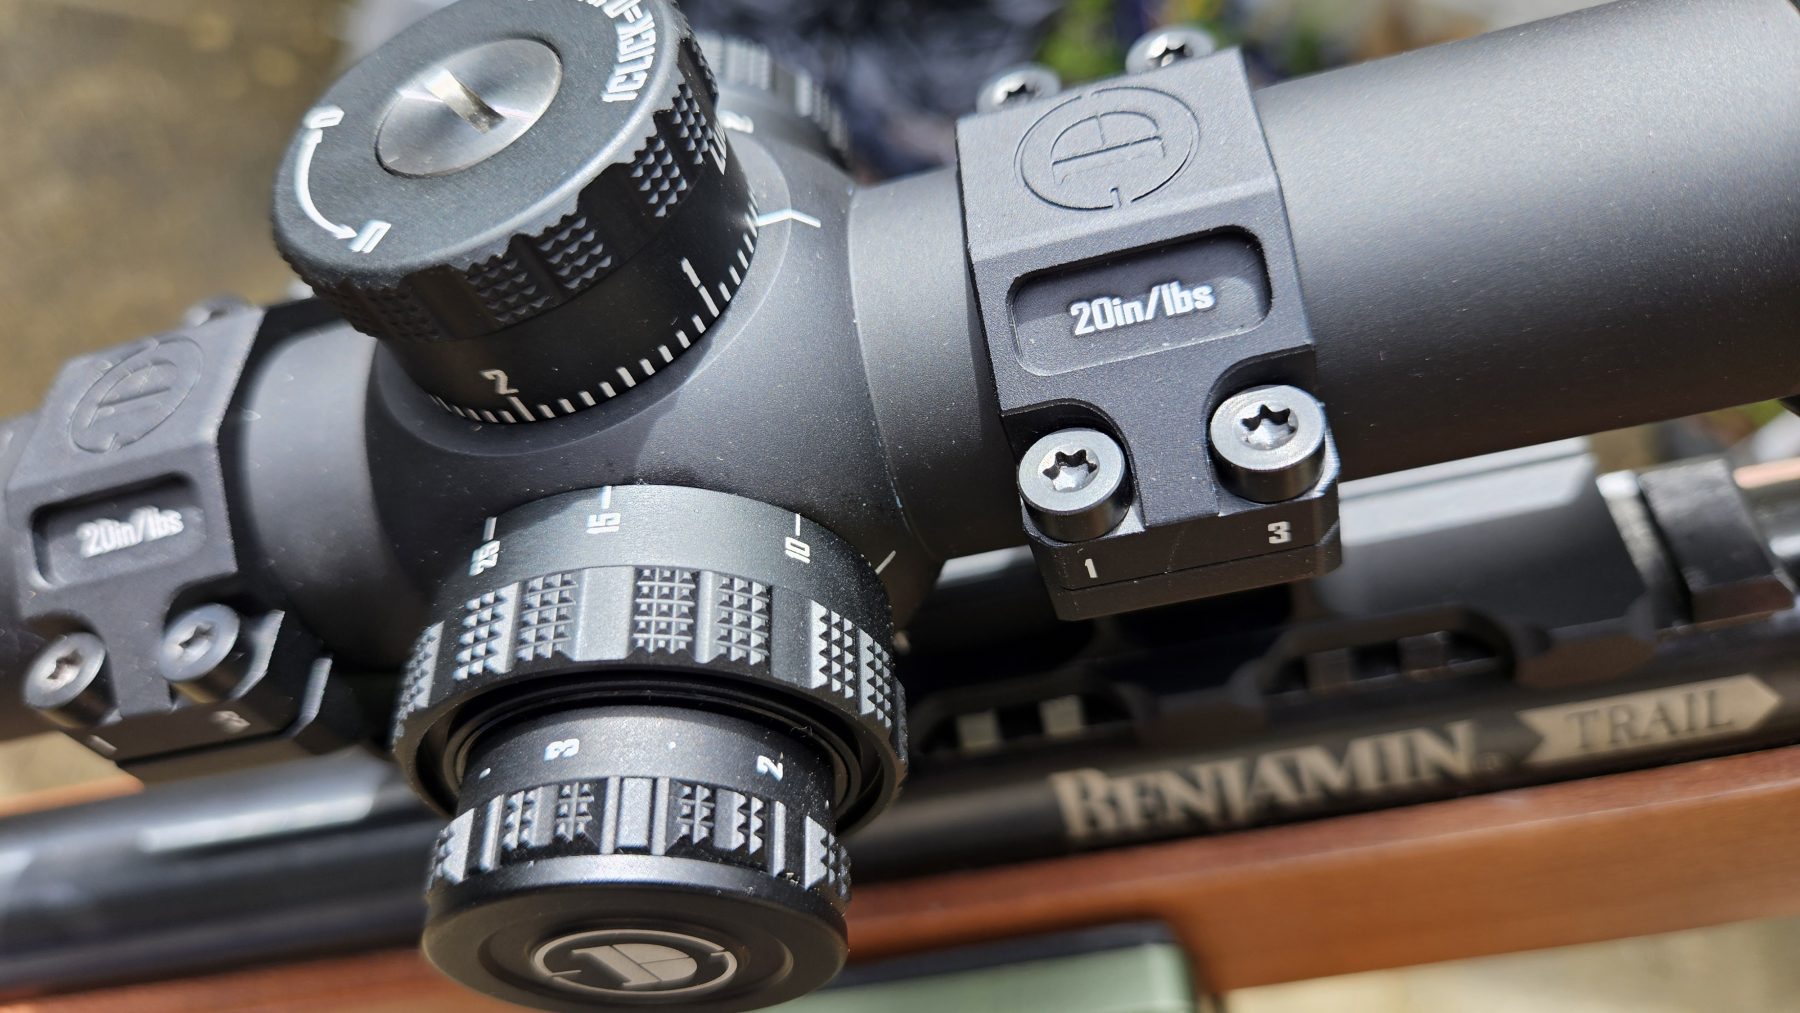
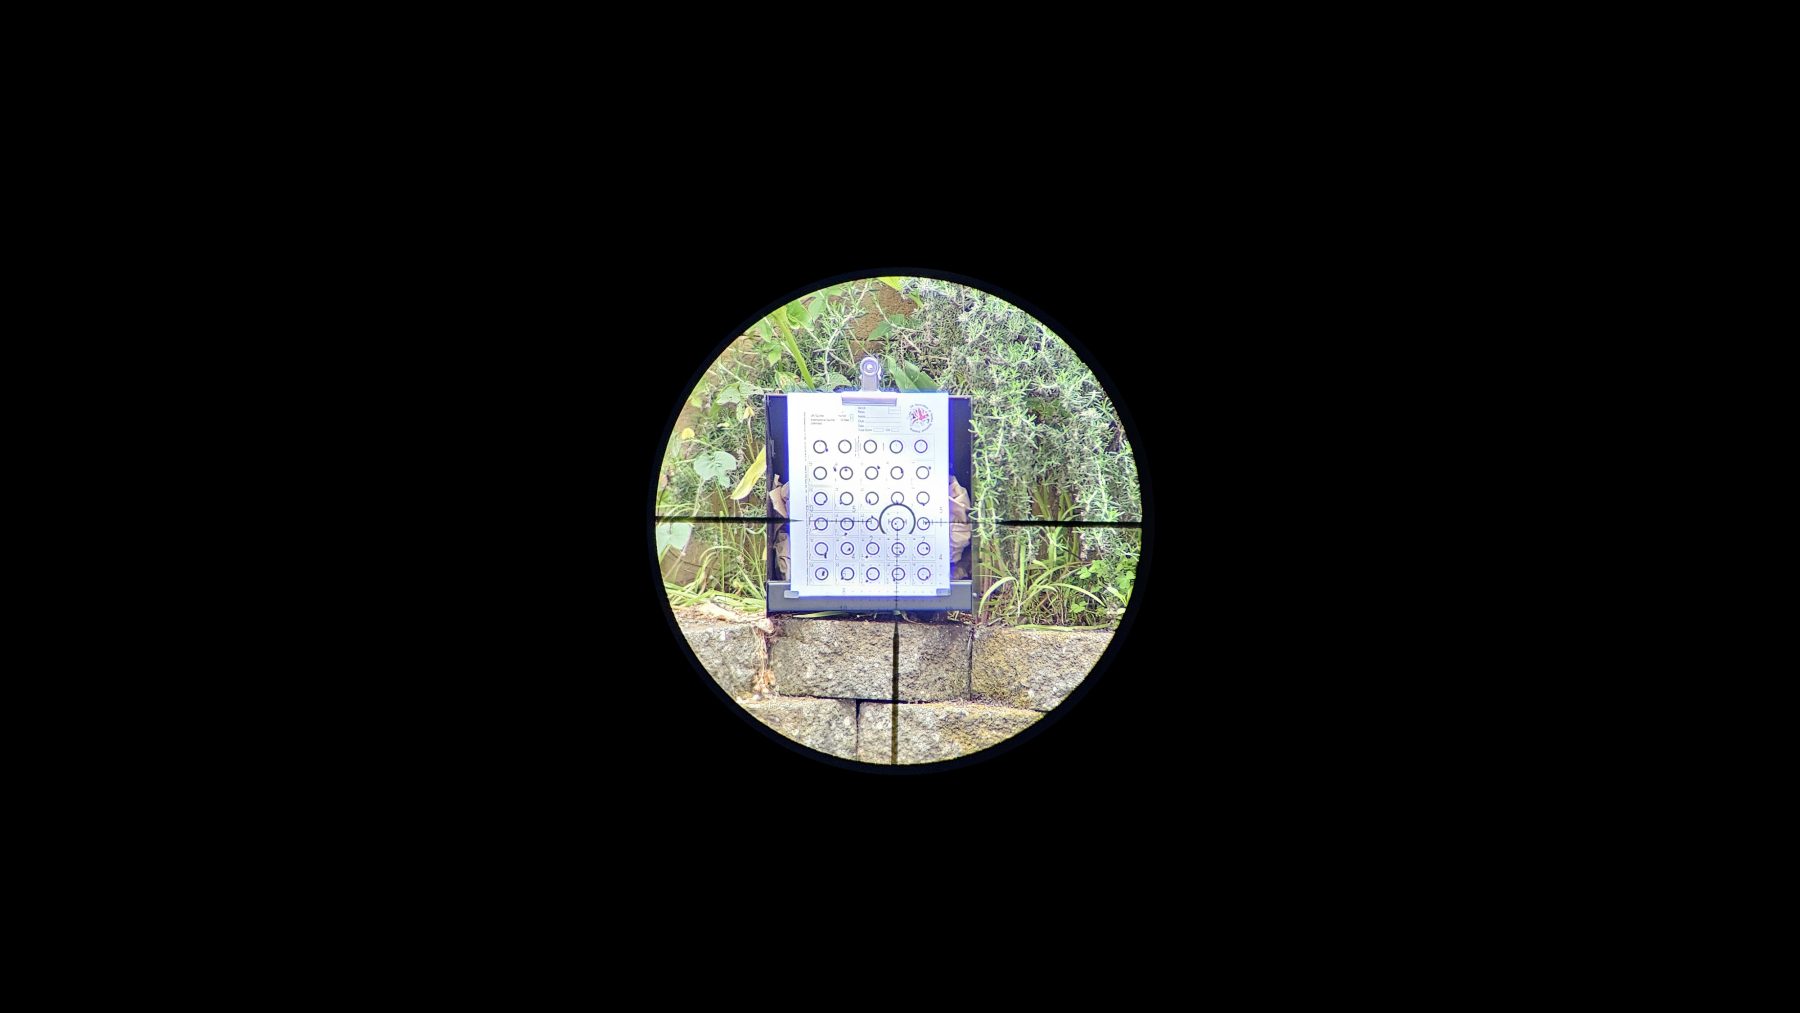
Discovery Optics ED line of premium budget scopes claims to be durable enough to withstand use on a break barrel. I put that claim to the test on my Benjamin Trail Nitro NP2 rifle chambered in .22 caliber.
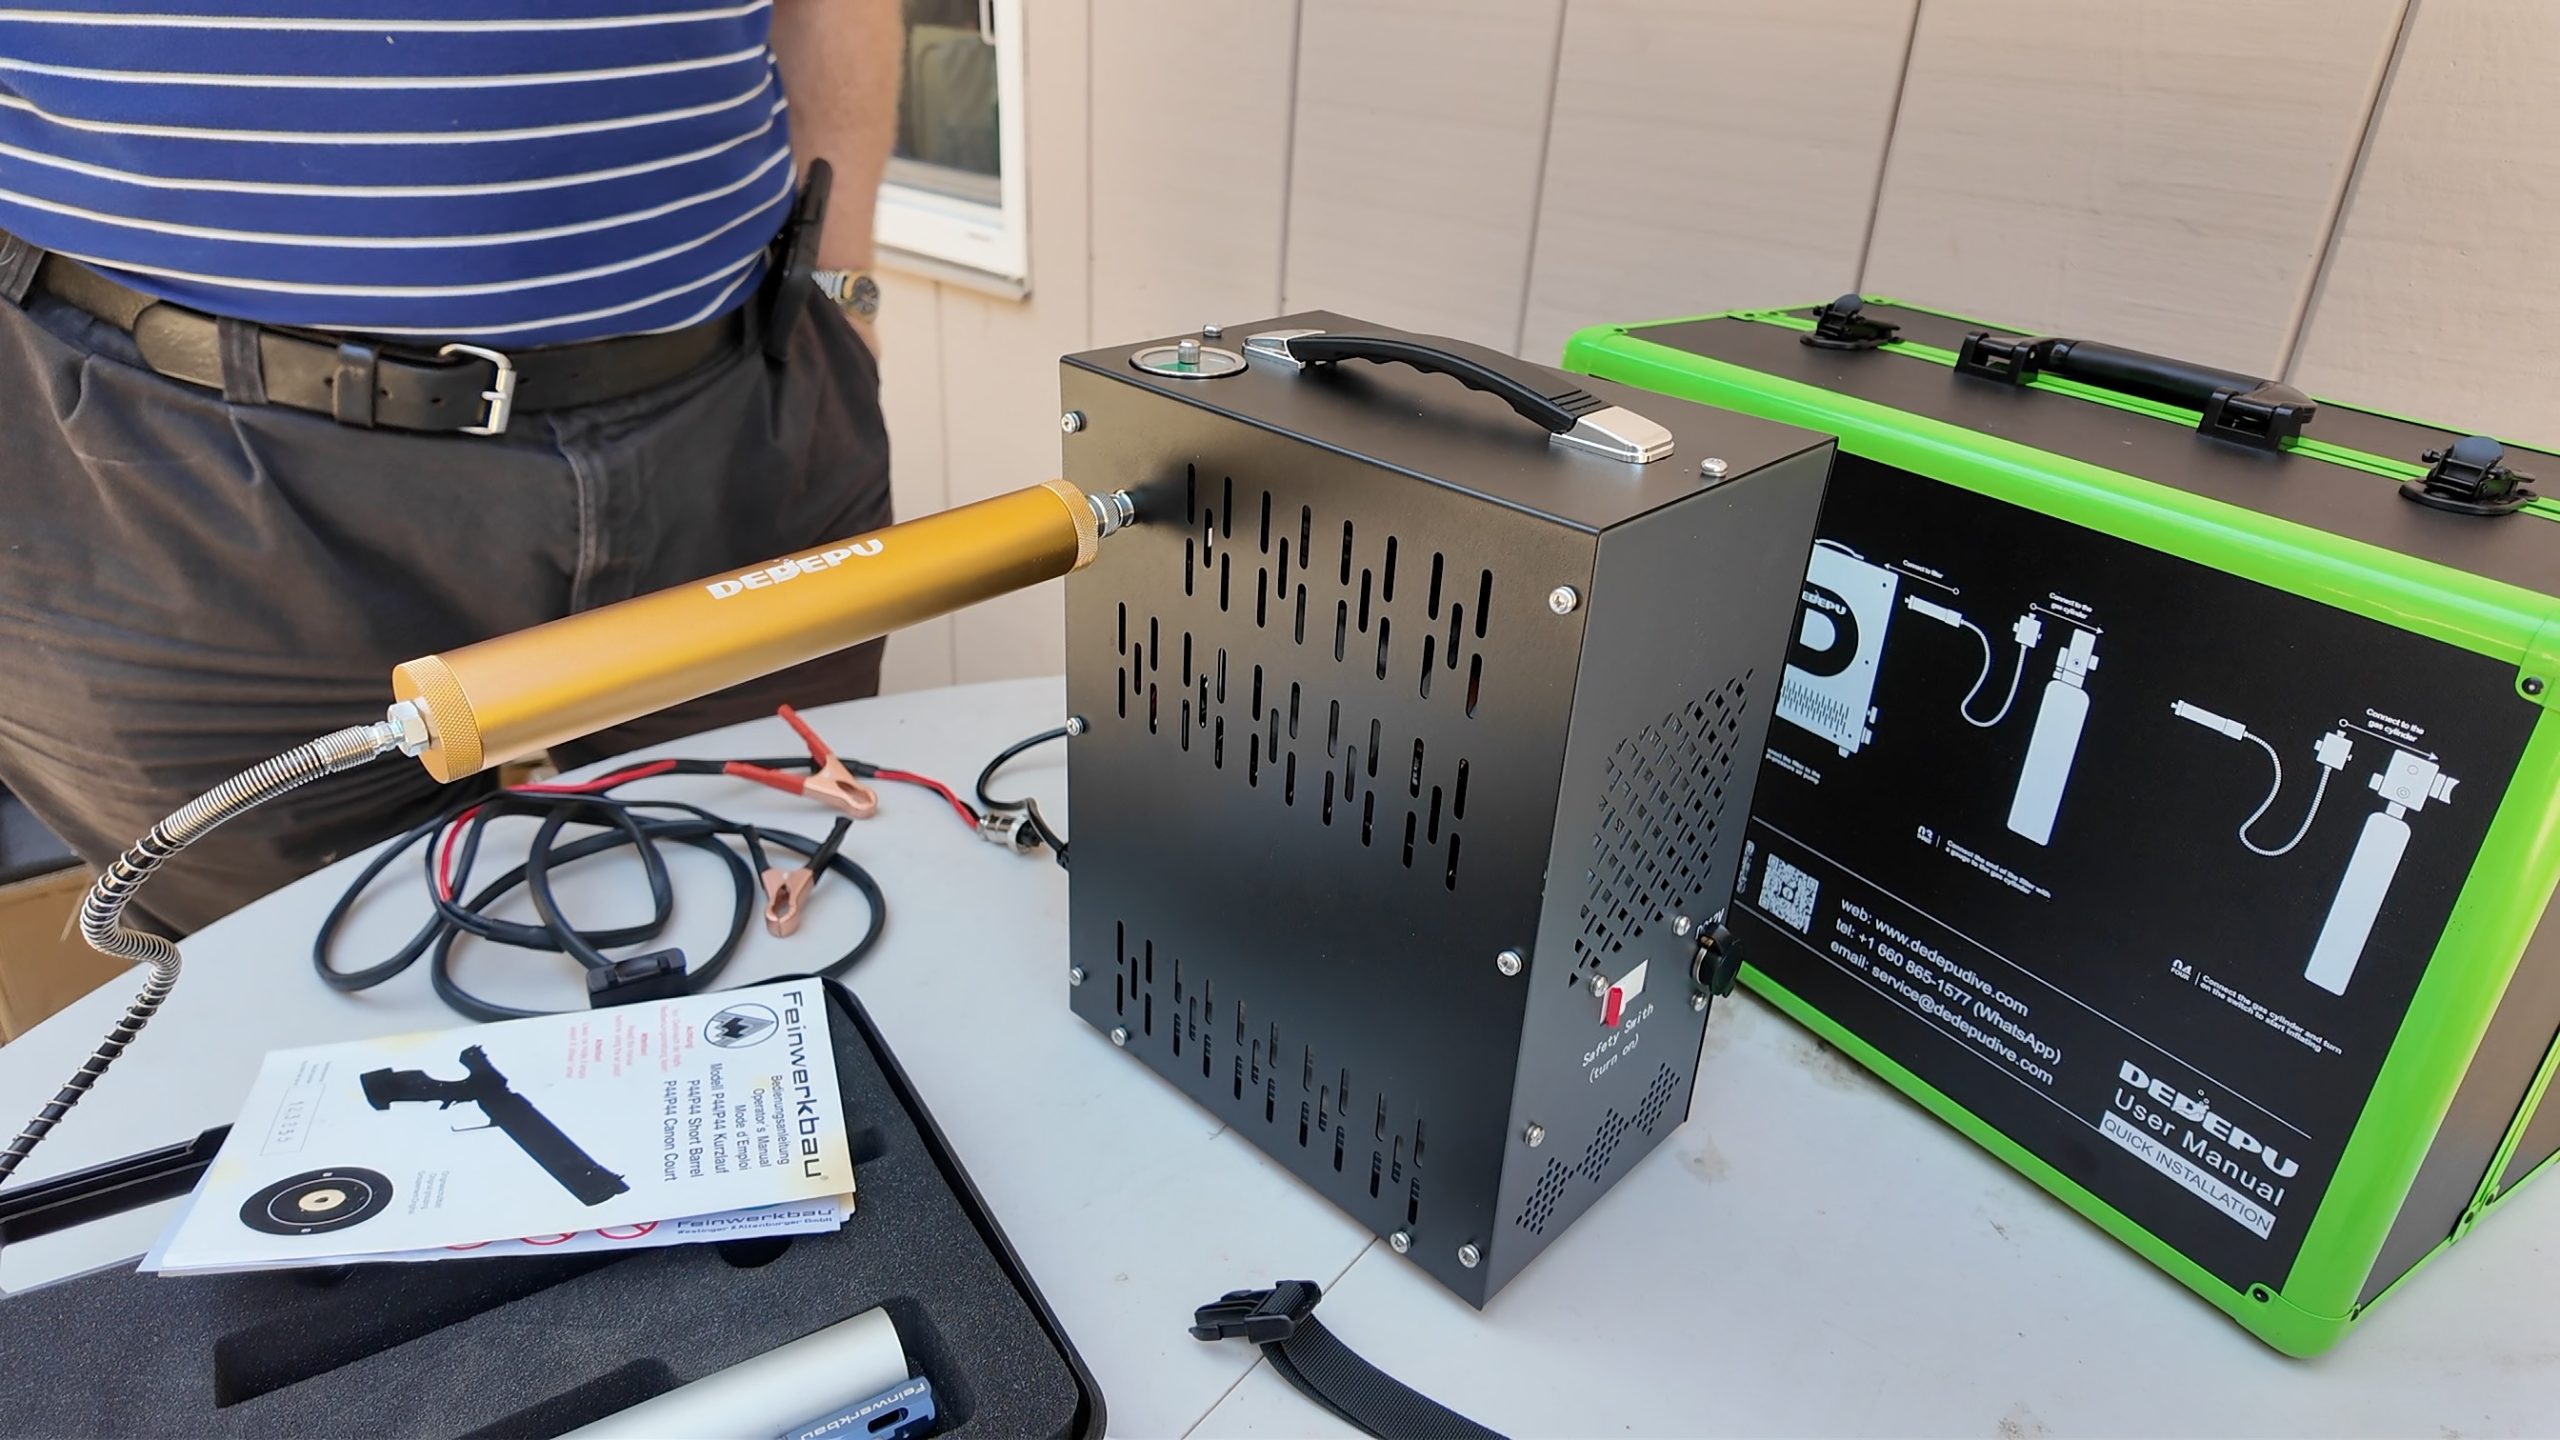
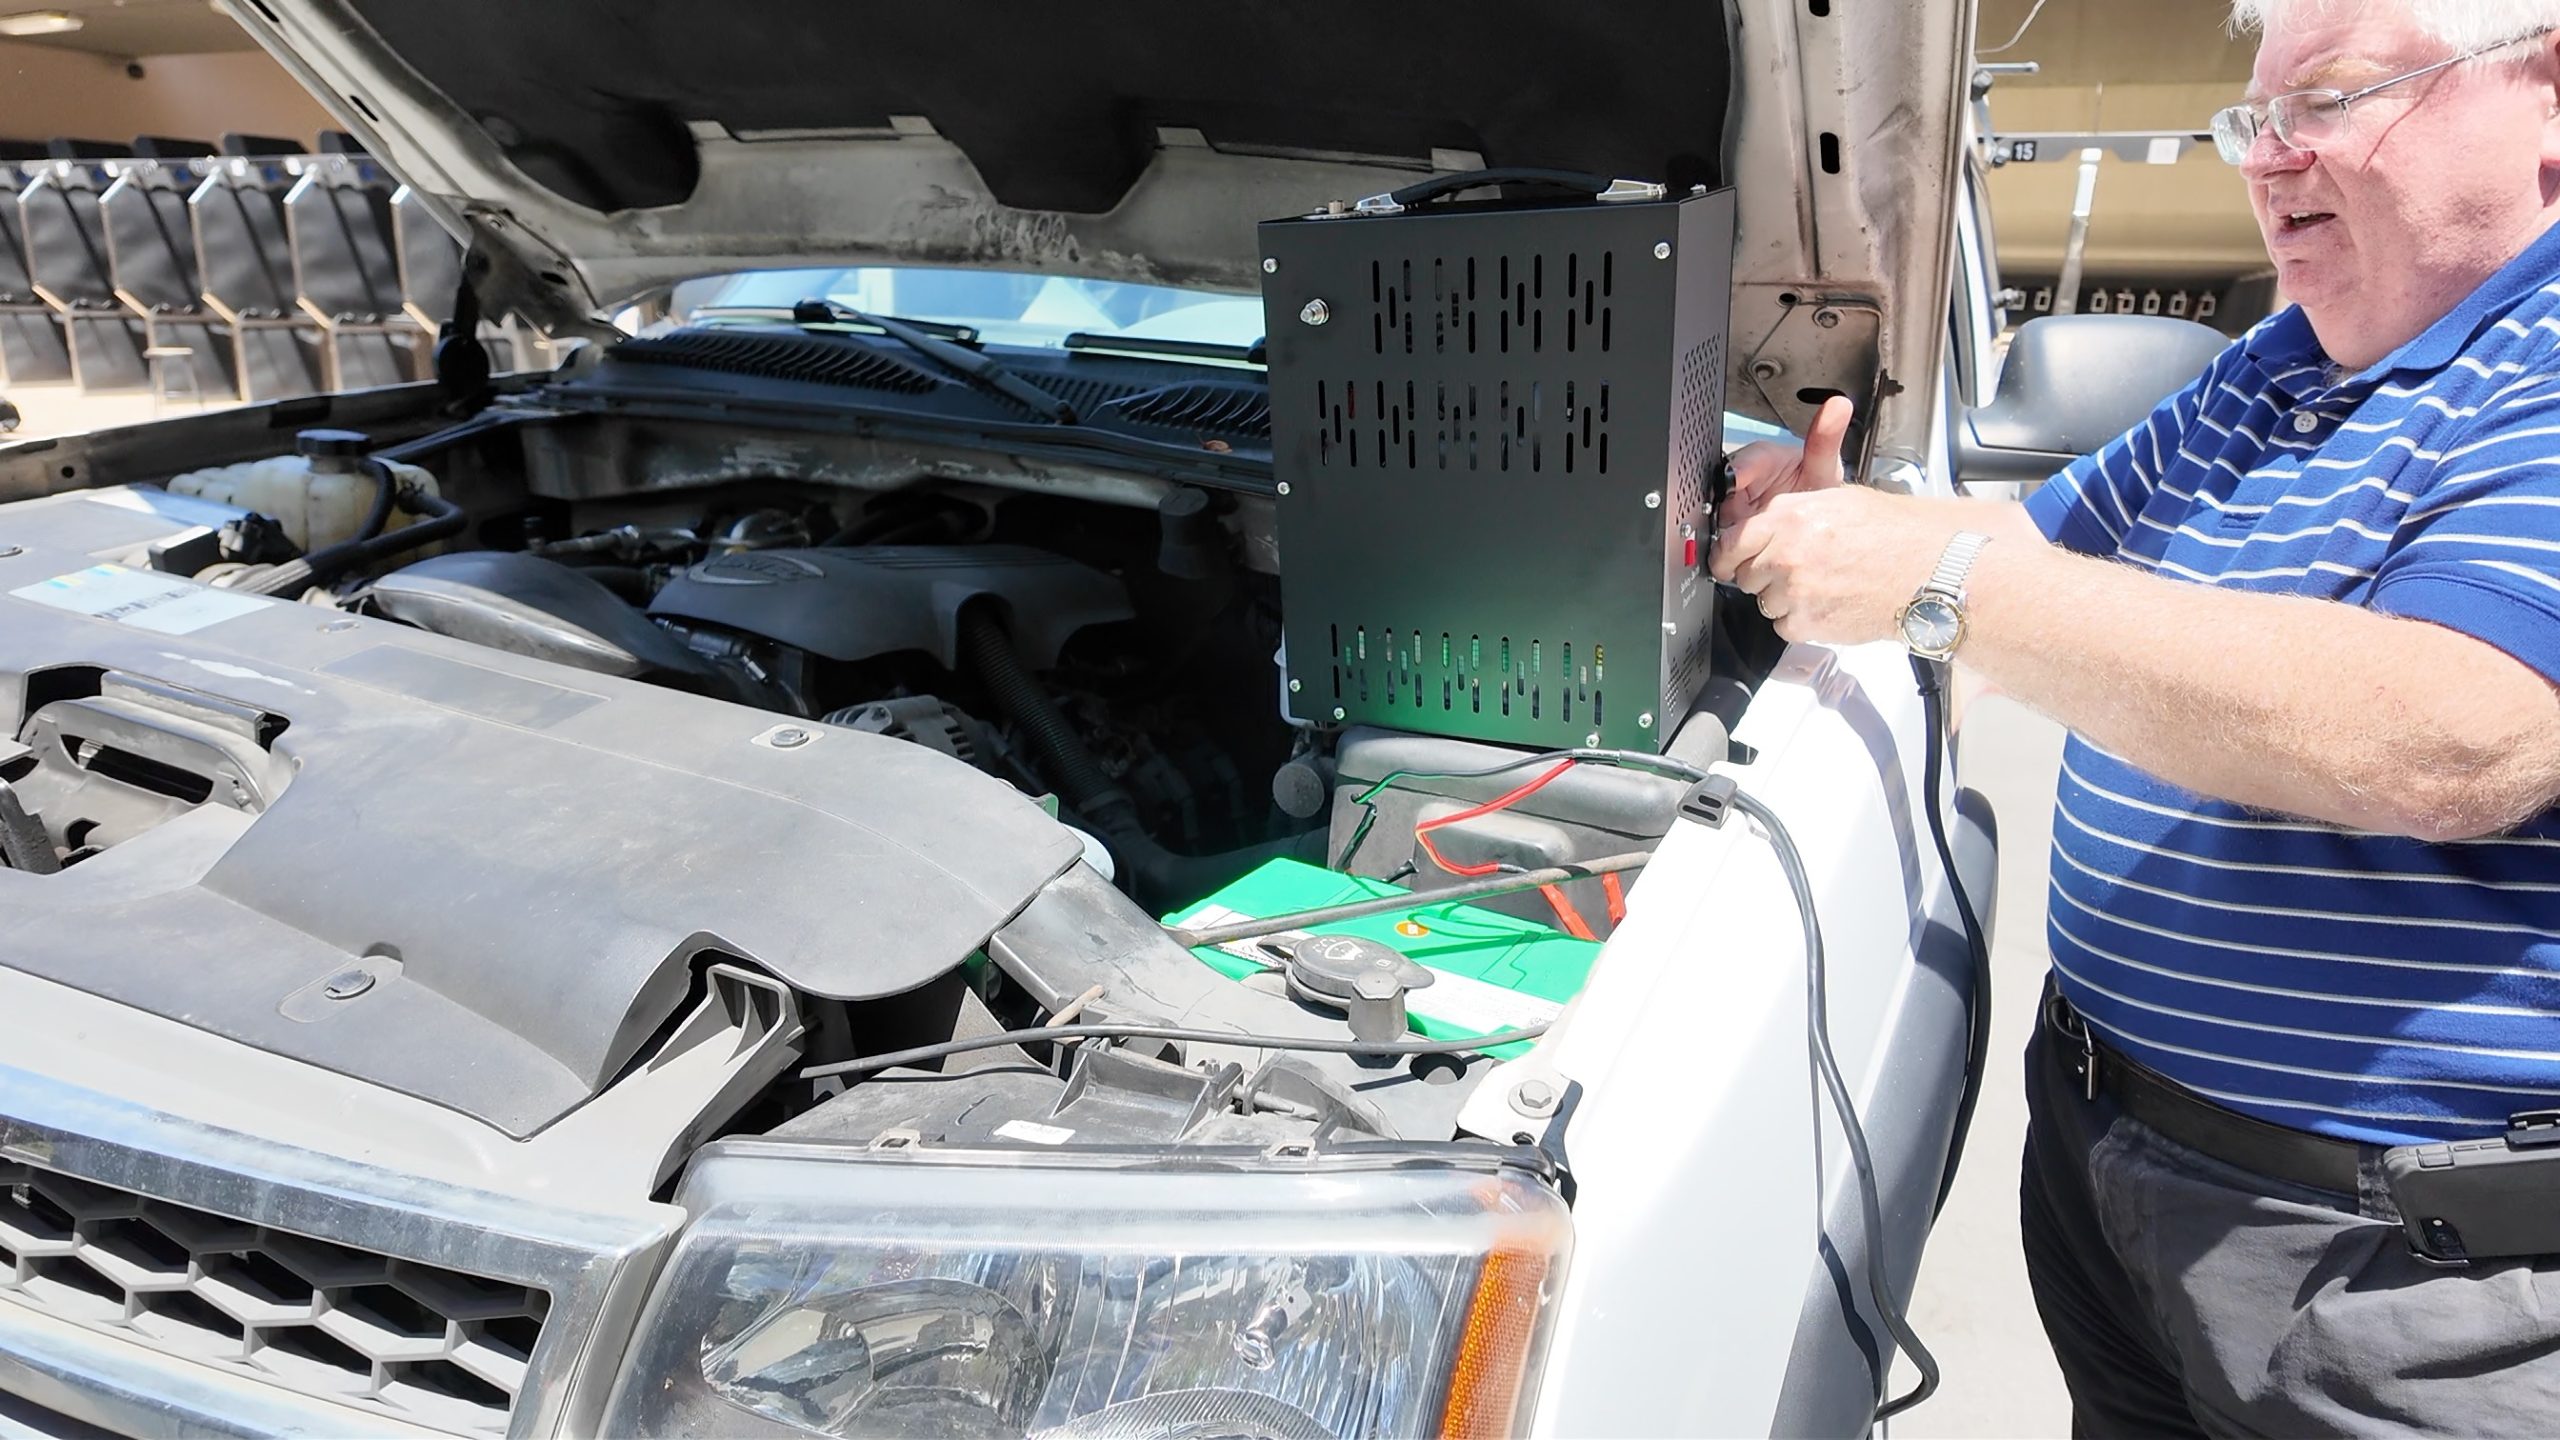
DEDEPU is a specialty scuba tank company that produces a portable electric air compressor for its mini scuba tanks. This electrically powered air compressor can also be used to fill air tanks used in PCP tanks used in airguns, paintball, and airsoft. My hobbies encompass both, and fortunately, they reached out to me to test it for the latter.
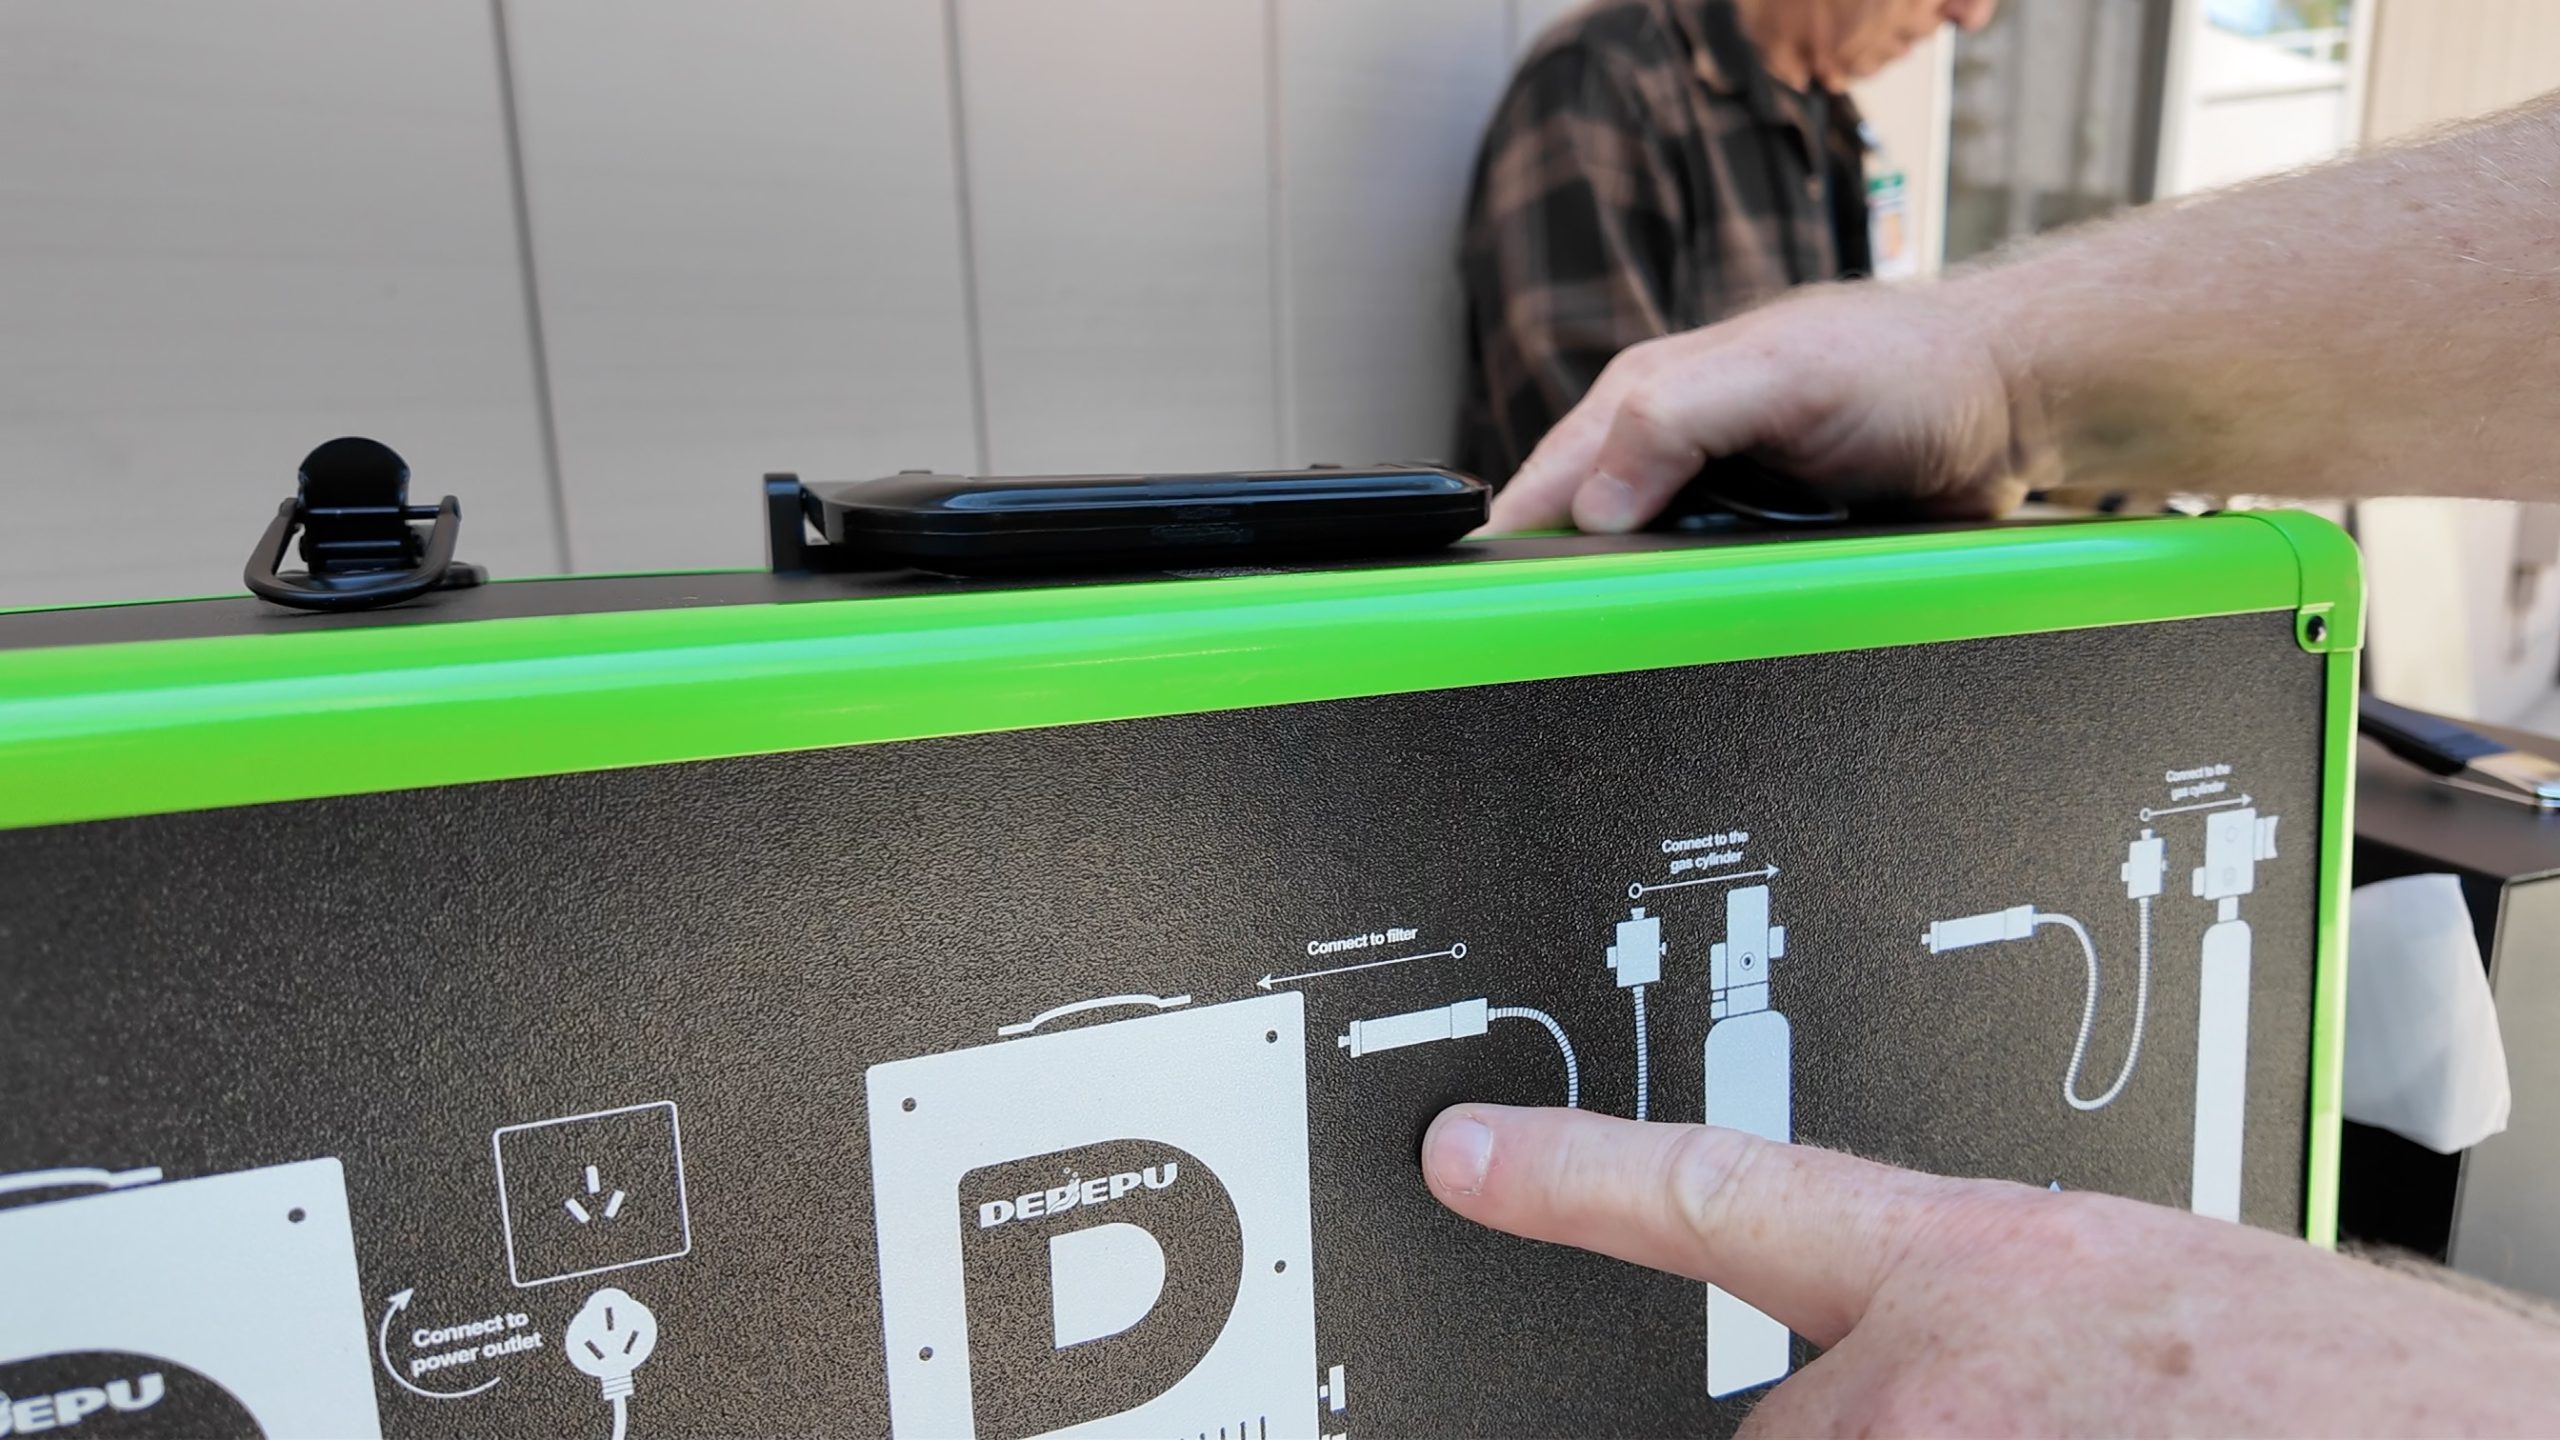
The unit comes in a large, hard-shell lockable travel case. Inside the case is high-density foam padding with just enough space for the compressor unit and its cables, hoses, and filters. The air compressor unit is a black metal case about the size of an early 1990’s PC, weighing about 27lbs. It contains a pair of computer fans to cool the compressor, a pressure gauge, and connector ports for air and power.
The unit can be powered either with 12V DC power or 110/220V AC power. There are separate connectors on opposite sides of the case. There is a separate power/kill switch for AC or DC, respectively, with a 3rd compressor/fan activation switch. The pressure/fill gauge has a selector dial that controls its auto-shut-off feature, which turns the pump off after the tank/hose has reached the selected pressure.
The DEDEPU pump has a maximum rated pressure of 6000 PSI, so it can fill 4500 HP PCP hunting air rifle tanks. It took about 7 minutes to fill a PCP pistol to 3000psi. While not very fast, it was surprisingly quiet for an air compressor. While speed is a convenience, slow is less stressful to tanks and can help prolong their lifespan. The DEPEPU pump has a retail price under $500. While not a budget pump, its high-quality build and components, and ability to be safely used for both airgun and SCUBA give it a value that cheaper pumps do not have.
Athlon Optics already had a broad line of rifle scopes from budget (Talos) to high end PRS (Cronus) and Tactical scopes (Ares), and hunter (Midas). So it was surprising to find that they were coming out with a whole new line called Heras named for the Greek god and wife of Zeus.
The Heras are being called “crossover” scopes because these scopes combine the reticles and glass found in their PRS scopes, hunting features from their Midas, but with a minimum focus distance of 10yrds. This close range usability makes the Heras appealing to precision rimfire, airgun hunters or even airsoft players. The Heras will occupy a mid-tier price point of with an MSRP ranging from $500-$700.
The Shooting Product Club sent me an Ideagle Havy Duty Pellet Trap. Initially the product described this as a .22cal Bullet Trap for BB and airguns. I warned them that this could lead to dangerous results if a buyer mistakenly used a .22cal 22LR firearm. They thanked me for the warning, updated the product description on Amazon and sent me the trap to test and evaluate.
I was still a bit skeptical at first as most pellet traps I’ve seen are made for .177cal BB’s and pellets. When .22cal pellets are used, they will deform and damage the metal due to the greater mass and energy of the projectile. A typical .177 lead pellet will weight 7gr while a .22cal pellet weighs over 14gr; more than double the weight. Fired from the same airgun, due to air resistance and retained energy, a .22cal pellet will hit with nearly double the energy of a .177cal projectile.
The package arrived and tipped the scales at just over 11lbs. Opening the box, I found it stuffed with 20 white packs of “Sealant”. This was a foam insulation in all Chinese packaging similar to HVAC sealing putty used by airgunners as a bullet trap medium. Inside were 4 black metal panels and a ziplock bag filled with hex screws, an Allen wrench, and parts for a target clip.
The box did not come with printed instructions but wasn’t too hard to figure out. The trap box was about as easy to assemble as typical IKEA furniture; so easy but time consuming. I was sent a link to download an e-document describing assembly instructions, but left off applying the foam until later in the test to evaluate its effectiveness in reducing ricochets and impact noise.
The rear and bottom panels were about 4mm (3/16″) thick which was much thicker than most pellet traps I’ve used (a far cry from the plastic, fabric, and cardboard “Daisy BB Trap” I’d used as a kid). These thicker panels were made thicker to withstand the direct impact of the airgun projectiles and the rear panel sloped, to deflect the projectile debris downward into the bottom panel which was the effective catch tray for the spall and debris. The side panels were much thinner at about 1.5mm but still rigid enough that I didn’t fear denting or bending it when applying weight or manhandling it.
At my local gun range, set the Ideagle trap on the ground and clipped on a paper bullseye target. I tested it at the recommended 25yrds distance. I fired 10 shots of .22cal 14.3gr roundnose lead pellets from a Benjamin Trail XP Magnum NP rifle. I aimed for the center bullseye and all shots landed with a typical clanging think of lead on steel.
I inspected the trap and found no outward ricochet holes on paper. Some paint chips and small bits of lead spall had escaped under the paper target, likely having bounced outward hit the paper and fallen without sufficient velocity to break paper. Inside the trap, I discovered half of my shots hit the the raised back lip of the bottom panel and not the rear angled impact panel. This was because I fired from a sitting bench height downward onto the trap on the which was positioned on ground. Despite this, the trap showed no distress of damage beyond the surface chipping of the black paint.
I raised the pellet trap and placed it on a barrel the same height as my shooting bench for the rest of the testing. I moved my shooting position 10yrds from the pellet trap, which is typical airgun competition distance to the target. I fired 10 more rounds onto the center of a fresh paper target and inspected the trap.
All 10 shots landed squarely in the rear angled impact panel this time. There was a bit more paint and small debris under the target but there were no outward holes on the paper indicating that none of the spall had ricocheted with enough energy to break paper. On close inspection, the rear panel only sustained surface paint erosion but I could see or feel no deformation on the steel panel.
Next I tested applied the insulation foam to the back panel as described in the e-doc instructions. The foam was very soft and tacky, like melted caramel, and difficult to pull out of its plastic wrapper. The ambient temperature was about 70ºF so it wasn’t very warm.The instructions advised chilling the packets in a “freezer” to stiffen the foam. That should work but you may not have an ice box handy, so I recommend simply peeling off part of the plastic wrapper simply pressing the foam inside of its wrapper onto the panel to save time.
With 9 packets of foam applied to cover the inside of the rear panel. I went back to my 10yrd shooting bench and fired 10 more onto a fresh paper target. This time, I fired all around the target area following a clockwise pattern around the outer ring of the bullseye target so my shots would land on different parts of the panel instead of just the center. My initial reaction was of slight disappointment as the rapport of the impacts didn’t seem quieter. During editing I could see a shorter sound signature of the impact but subjectively there wasn’t much reduction in noise between the foam on the panel and without the foam.
I inspected the trap and found a reduction in debris in front of the trap under the target. Almost no paint chips and far fewer small spall pieces but oddly 2 large chucks of lead, though again none had penetrated the paper target. Inside, I could see holes where pellets had pierced the foam and packets but no sign of damage or deformation to the rear panel.
The foam insulation was somewhat unnecessary. It does reduce spall and could make lead clean up a little easier as it does capture a fair bit of of the projectile. But applying it along the rear bottom panel would capture more of the lead than spreading it all over the entire back panel. Airgunners use clay, HVAC putty, and simply old rags on the bottom of their pellet traps for this exact reason.
Overall the pellet trap worked perfectly as a backstop for .22cal airgun pellets. Surprisingly it did so without any sign of wear or damage. I feel confident in using this pellet trap for .22cal magnum airguns even at 10yrds.
This trap available on Amazon through my Affiliate link which supports this blog: https://amzn.to/3cweBSW