The .22LR Ruger Precision Rimfire (RPR) rifle was game changing when it was introduced. It was rimfire rifle that incorporated many custom precision features in a factory stock package, including a free-float, AR-style, M-Lok handguard, user adjustable trigger, user adjustable riser stock, and a 30-MOA Picatinny optics rail on the receiver.
What it does lack is a straightforward means to add traditional iron sights.
Iron/Open sights were probably nowhere in the minds of the RPR designers. Outside of Olympic rimfire rifles, modern precision rifles lack iron sights or any mounting points for them. But I wanted to teach my kids traditional shooting skills. I had to find a way to add iron sights to a rifle that was designed for magnified rifle scopes.
The pre-installed 30-MOA rail is much appreciated by Extreme Long Range rimfire shooters because this angled rail adds additional elevation to any rifle scope mounted on it. Unfortunately, this is problematic to adding an AR-style set of iron sights as the additional 30-MOA in elevation makes the rear sight too tall for 22LR shooting at ranges less than 100yrds. Most people shoot their .22LR rifles at 25-50yrds and certainly when using iron sights.
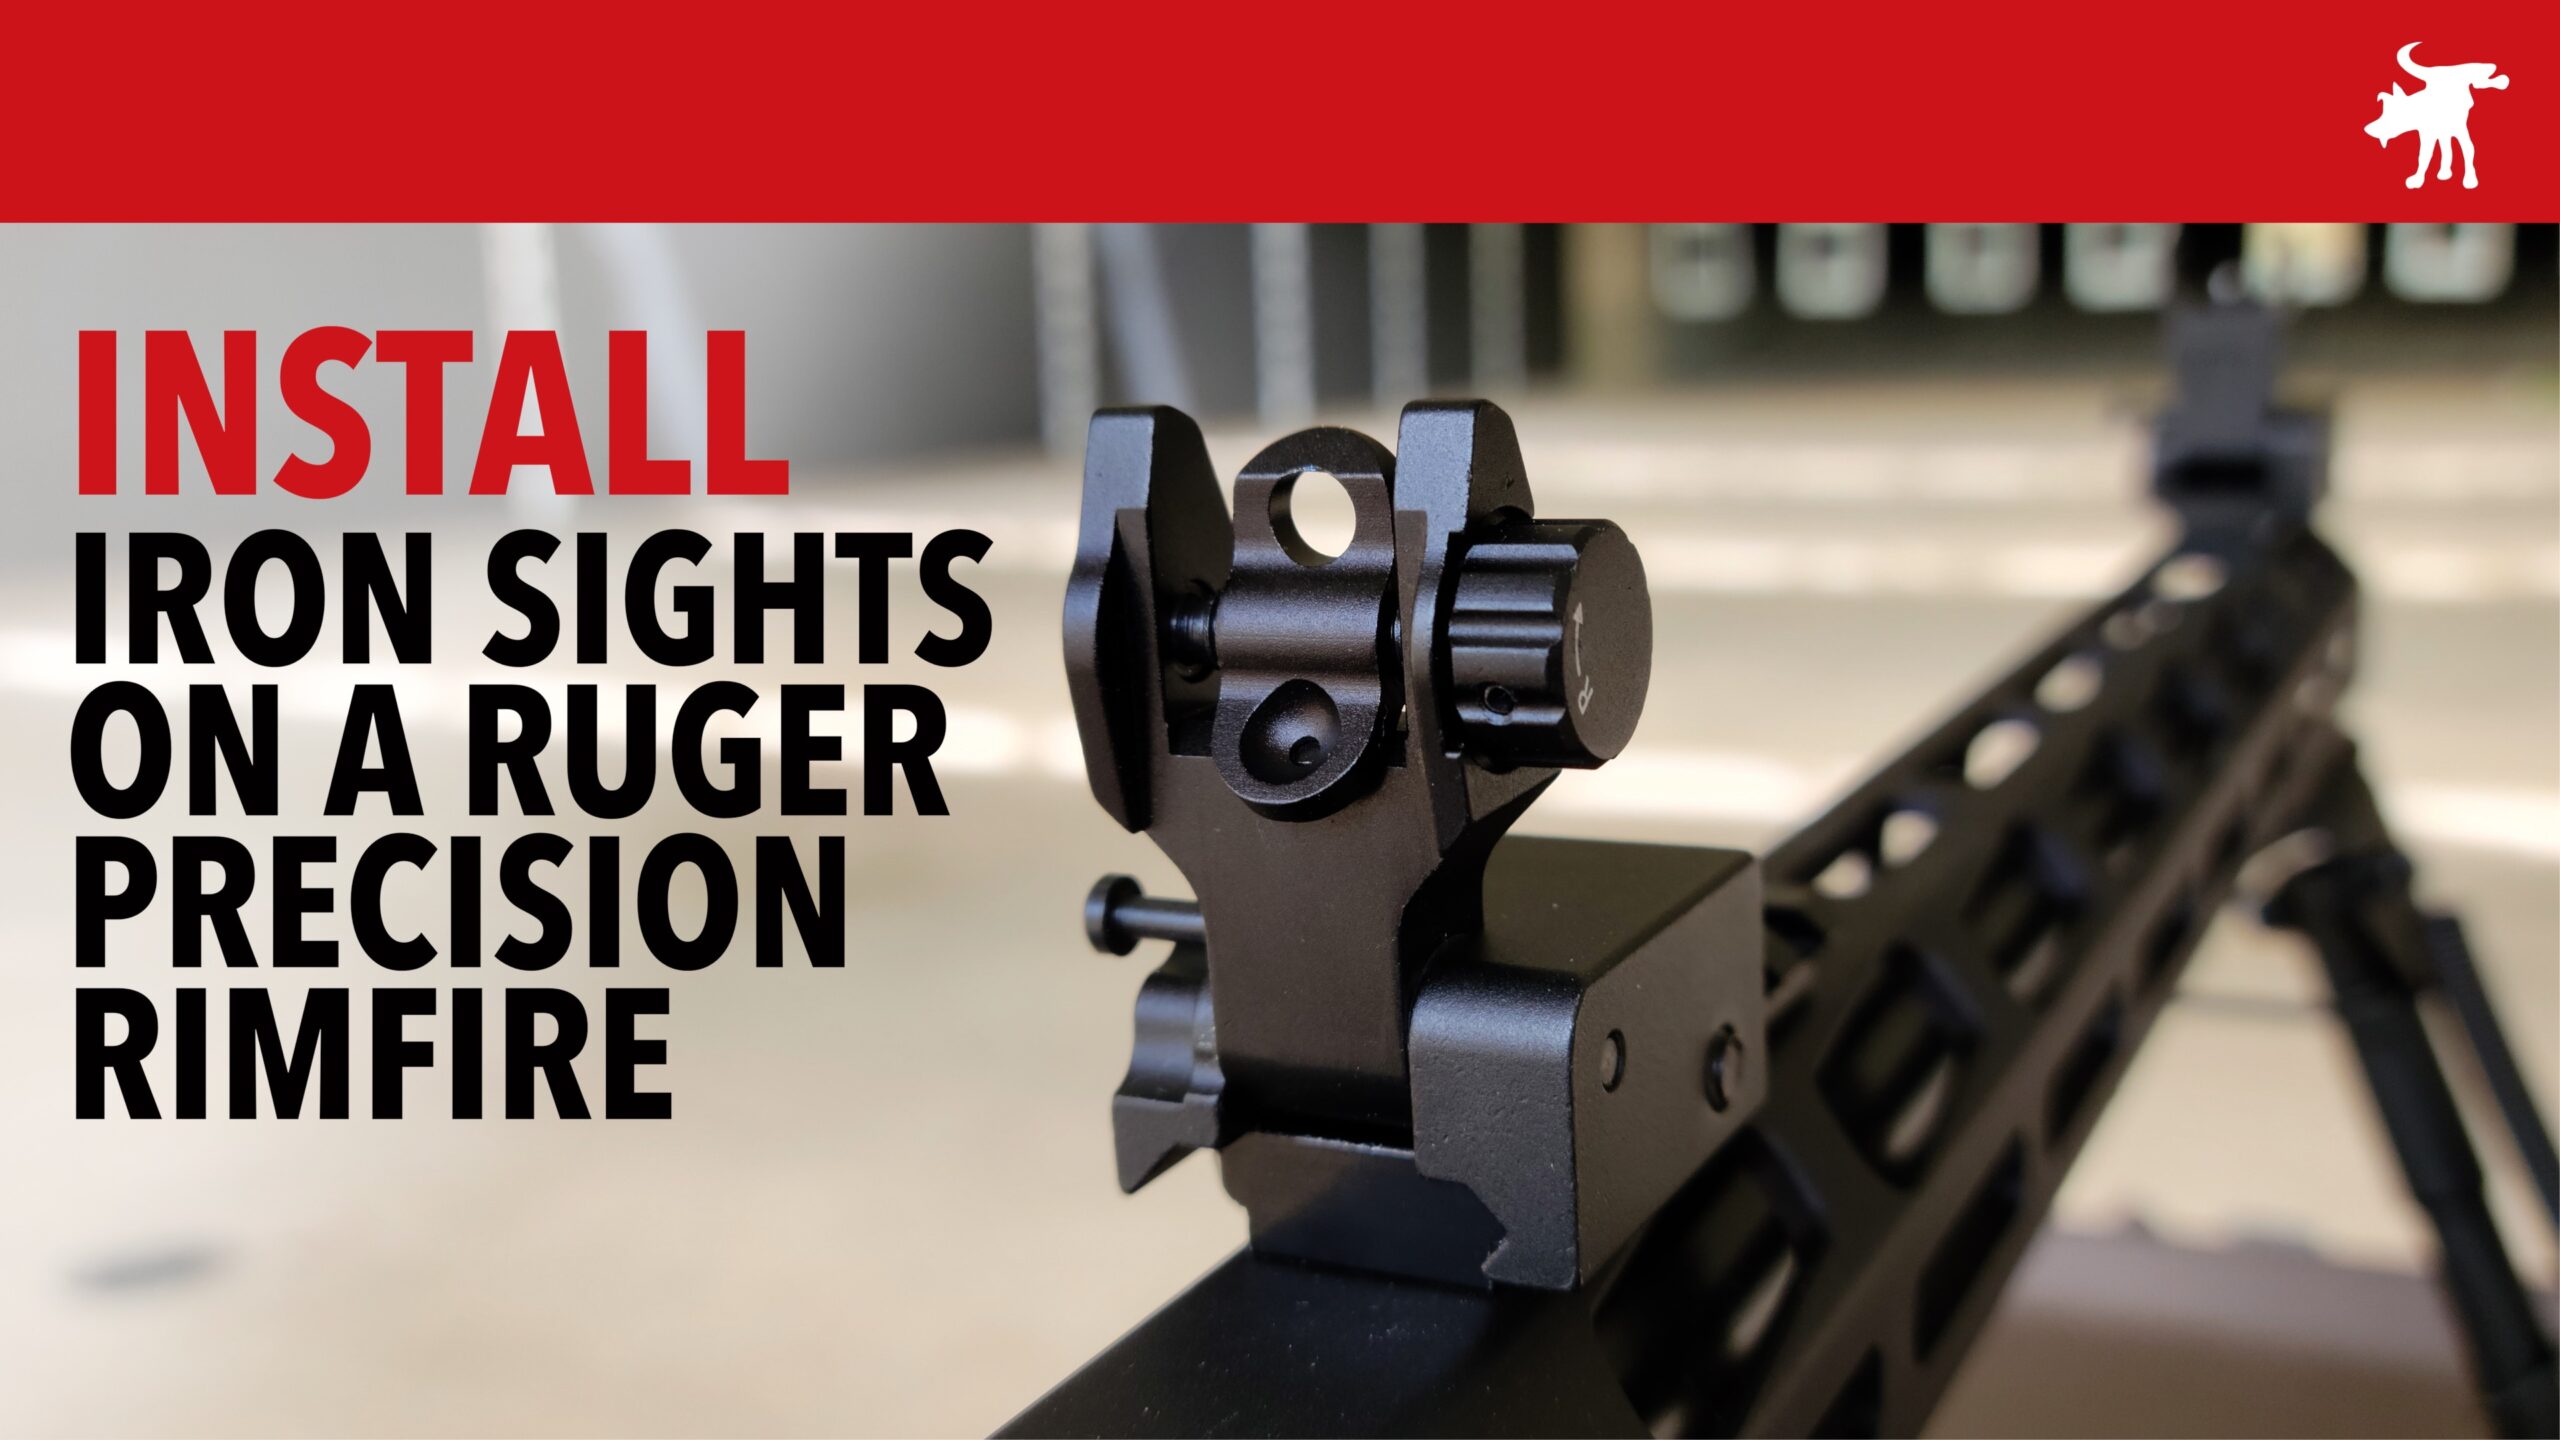
Fortunately the RPR’s M-Lok handguard provides ample slots to add Picatinny rail pieces and on these, I could mount generic AR-style flip up BUIS (Back Up Iron Sights). Mounting rear sights on the hardguard. well forward of the receiver may seem strange to many AR shooters accustomed to a position directly above the AR charging handles, but this position was actually the norm for most 20th century battle rifles like the Springfield, K98 Mauser, Mosin Nagant, and if you look closely the AK.
The far forward placement of the rear sight does make the aperture of the peep sight smaller. For my 50 year old eyes, I could not really use the small-aperture peep but the larger CQB-aperture worked just fine. The rear sight was easy to adjust for windage but the front sight post was a bit more work.
The front sight is an AR A4-style which requires a tool to depress a locking detent while rotating the sight post to lower or raise it. My sight tool didn’t quite fit the post properly but after some fiddling I used an Allen key to push down the detent while I turned the post with my fingers. I managed to lower the front sight post as well as I could to achieve a decent zero at 25yrds.
This unconventional handguard placement had the additional benefit of actually making them BUIS for this rifle. With a riser rail (or a high scope ring mount), my Arken SH4 with a 50mm bell was able to completely clear the stowed rear sight. For those who compete in rimfire competitions, this setup will also allow you to compete in open sight matches/stages with minimal reconfiguration; just pop off your scope and flip up your BUIS and you’re ready to go.
Depending on your budget and needs, you can buy Gucci accessories by big name brands. Or if you’re not in an NRL22 competition or mercenary combat scenario, you may be perfectly fine with generic low-cost accessories. Remember, this is a .22LR rifle with minimal recoil, so with I went cheap.
These BUIS and Picatinny Rail adapters are available on Amazon through my Affiliate Links
FANGOSS Mloc Picatinny Rails Set https://amzn.to/3MXOCAZ
Nelahol BUIS https://amzn.to/3z7swYH
15% discount code: IAPVCX7K